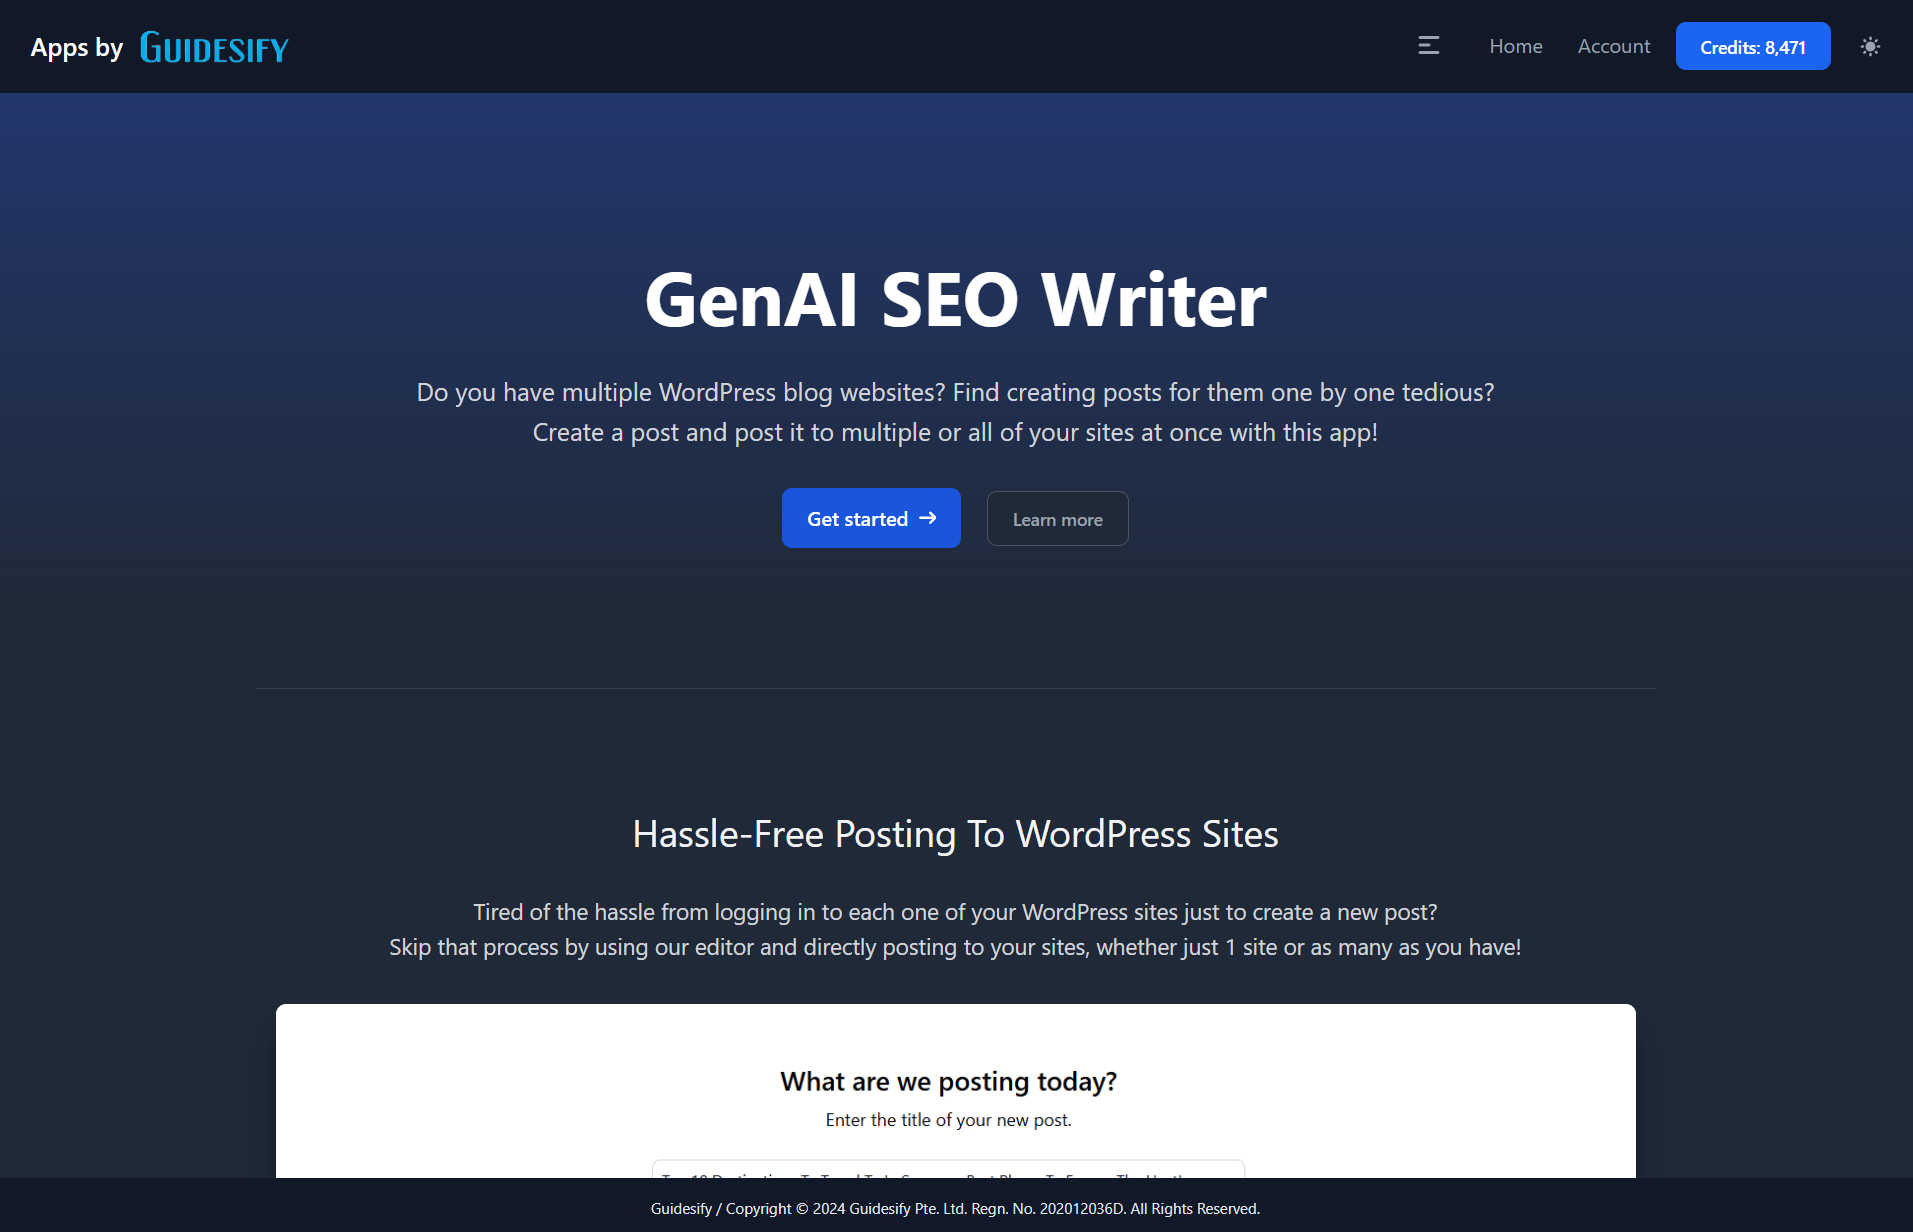
GenAI SEO Writer
The GenAI SEO Writer app is a premium app with the purpose of easing the process of writing SEO-optimised articles and posting them on your WordPress-based websites. This app lets you bypass the WordPress dashboard so that from the start of your writing to the finalisation of your post, everything will be done within this app.
Getting Started
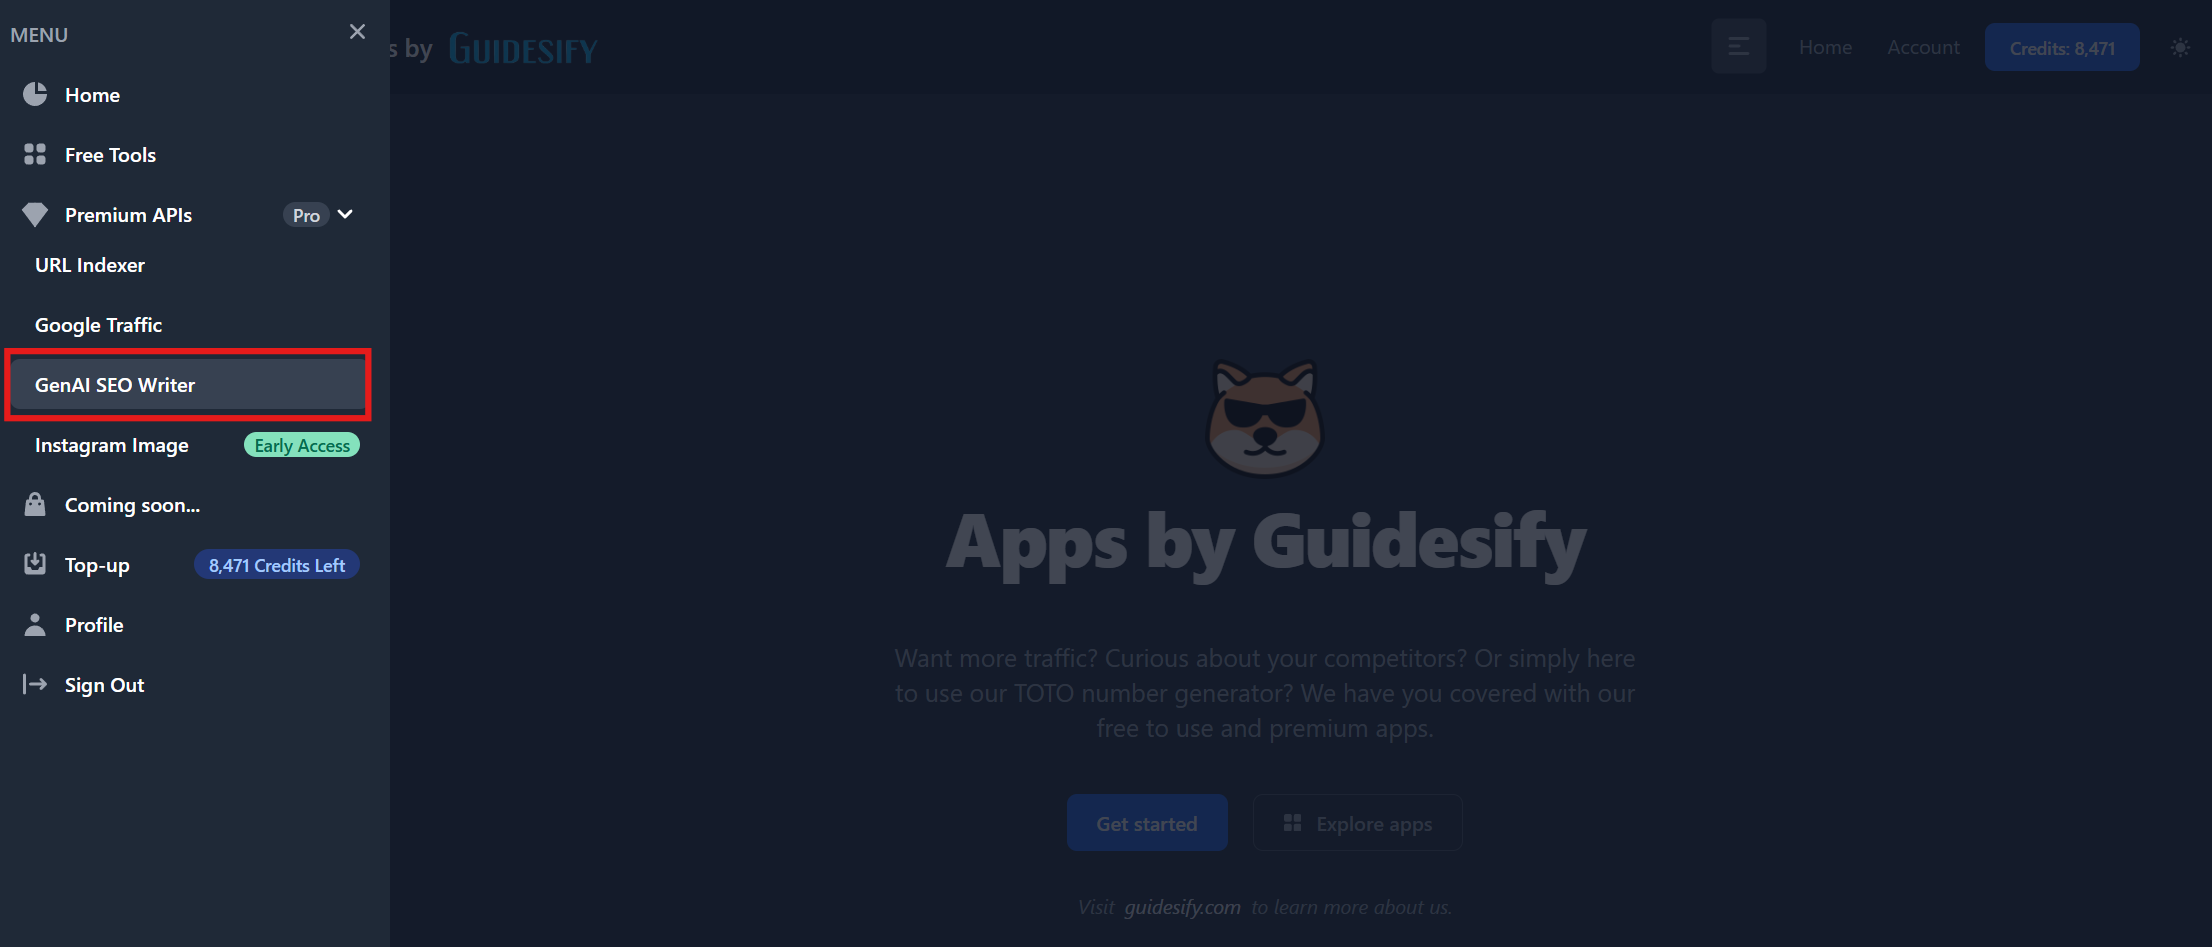
To access our app, first ensure that you are logged in to your account by ensuring that the top right of your screen, in the navbar, shows the number of credits that you have instead of the "Login" button. Then, click on the "View Menu" button and click on the "GenAI SEO Writer" on the menu that slides from the left or simply navigate to this site.
Managing Sites
Before you can use our app to post articles, you will first need to add at least one WordPress-based website. Take note that our app only supports WordPress-based websites. To add a website, click on the "Add Sites" button, ensuring that you are logged in.

Adding Sites
To add a site, ensure that for this, you have access to the WordPress dashboard's admin account as you will need the following:
- Your WordPress-based website's URL
- The Website's Admin Username
- The Website's Application Password
Your website's URL is simply the website anyone would use to access your website. Do ensure that you are adding the full url, e.g. https://guidesify.com where the "https://" is included.
The admin username here that you will need to enter is the username you would use to login into the WordPress dashboard.

To obtain your website's application password, you will need to login into your site's WordPress dashboard. In the WordPress dashboard, click on Users then Profile and scroll down to the "Application Passwords" section. Once here, enter an appropriate name for your password (take note that this is just a name, not the password itself) and a new application password will be generated.
Take note of this password and save it somewhere secure as you will not be able to view this password again in the future if you do not save it on your own and will have to generate a new password if you forget your current application password.
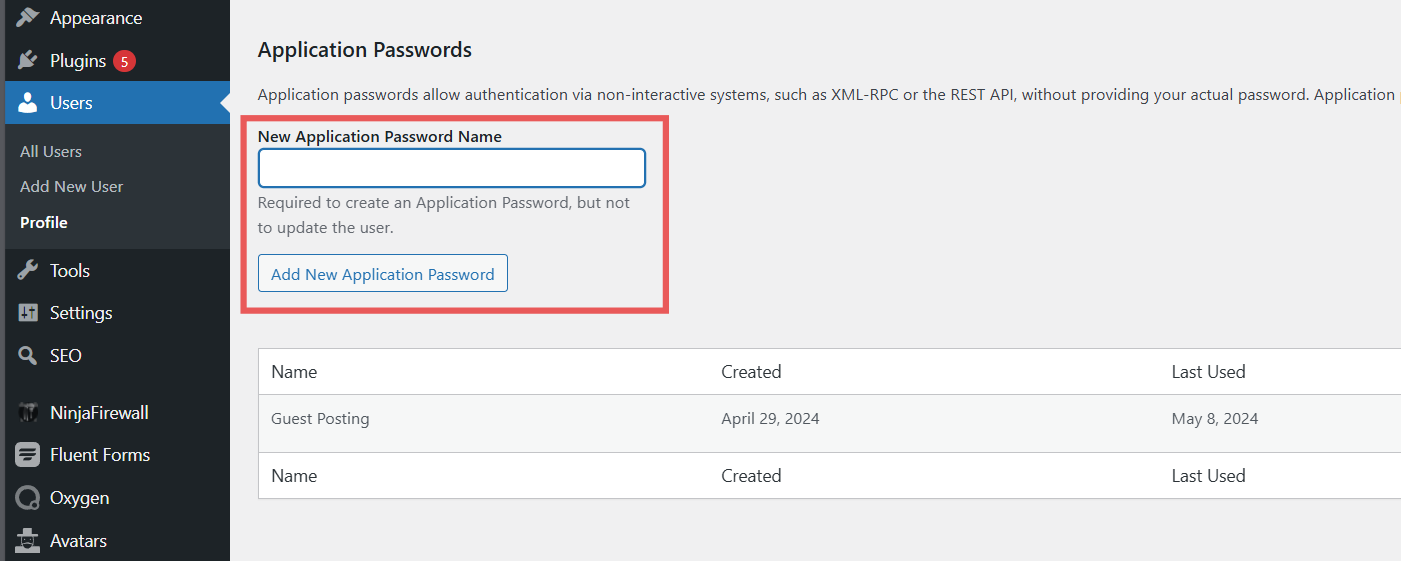
The application password should be a randomly generated 24-character long string of letters and numbers which you cannot edit. For a more comprehensive guide on obtaining the application password, visit this guide here.
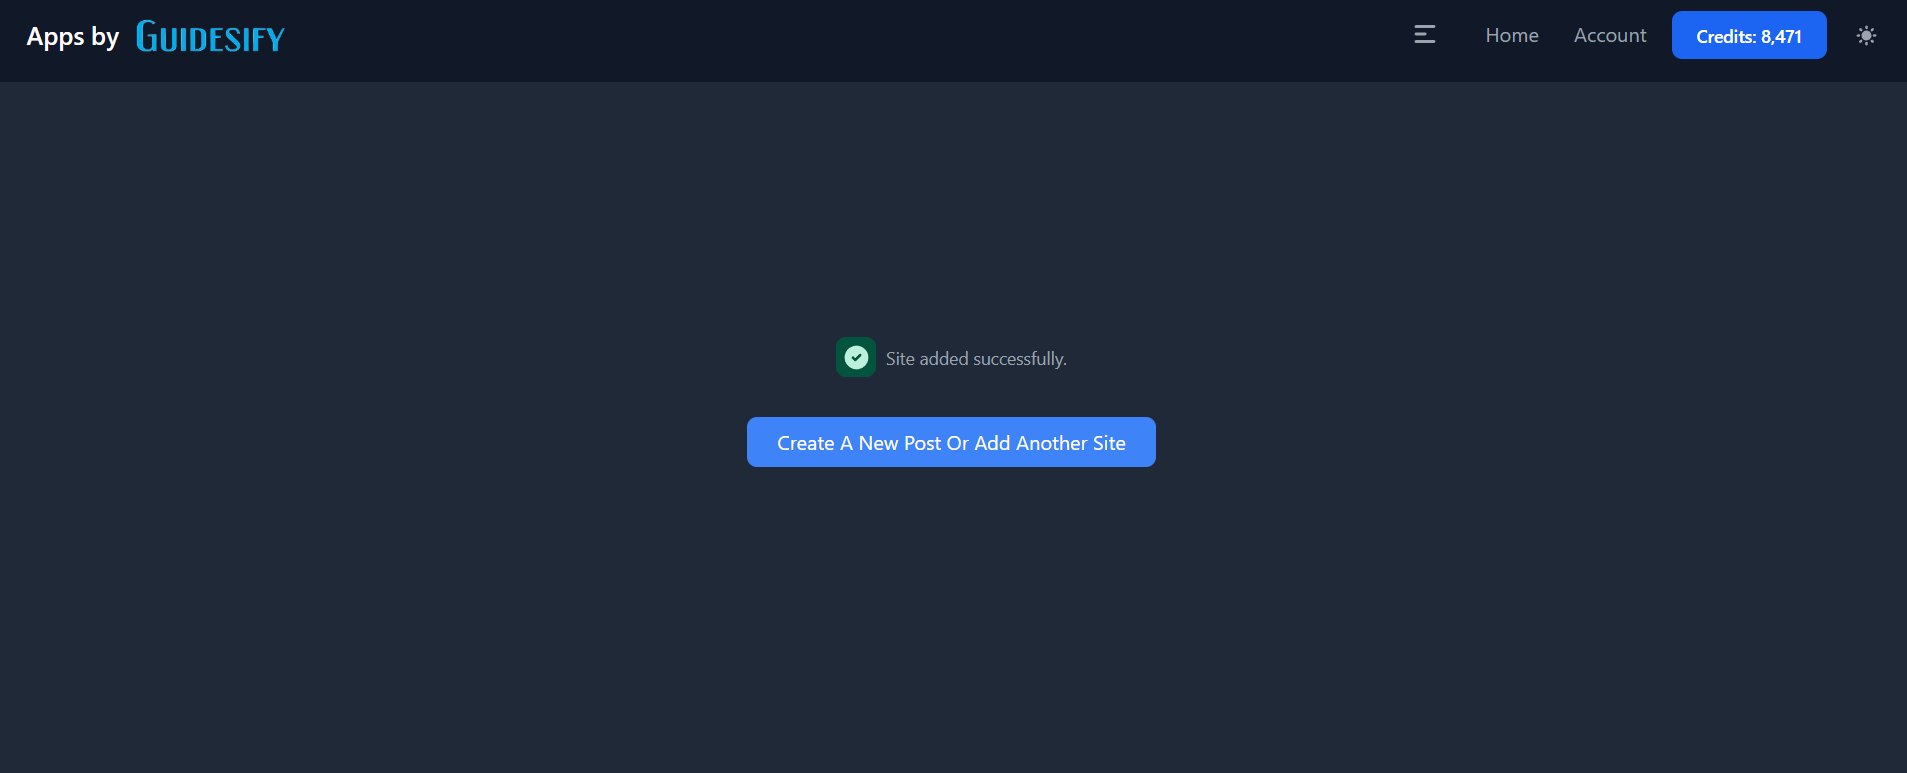
Once you have obtained all the necessary credentials, ensure that they are correct and click on "Add New Site". If all your credentials are correct, the following message will be displayed. Otherwise, an error message will be displayed and if so, please re-check your credentials and try again.
Telegram Channel Integration
If you have a dedicated Telegram channel to notify your readers of your new post, you can opt to add our Telegram bot to your channel to let us send a message to your channel that your newest post is up.
Adding Our Bot
The first step to integrating your Telegram Channel into our app is to add our bot. For all the following instructions, ensure that you are using Telegram Web (on a web browser) on your personal computer.
First, navigate to the channel you want to be integrated into our app. Ensure that you have admin access to the channel. Then, click on the "Edit" button, which is the pencil icon on the top right corner of your Telegram page.
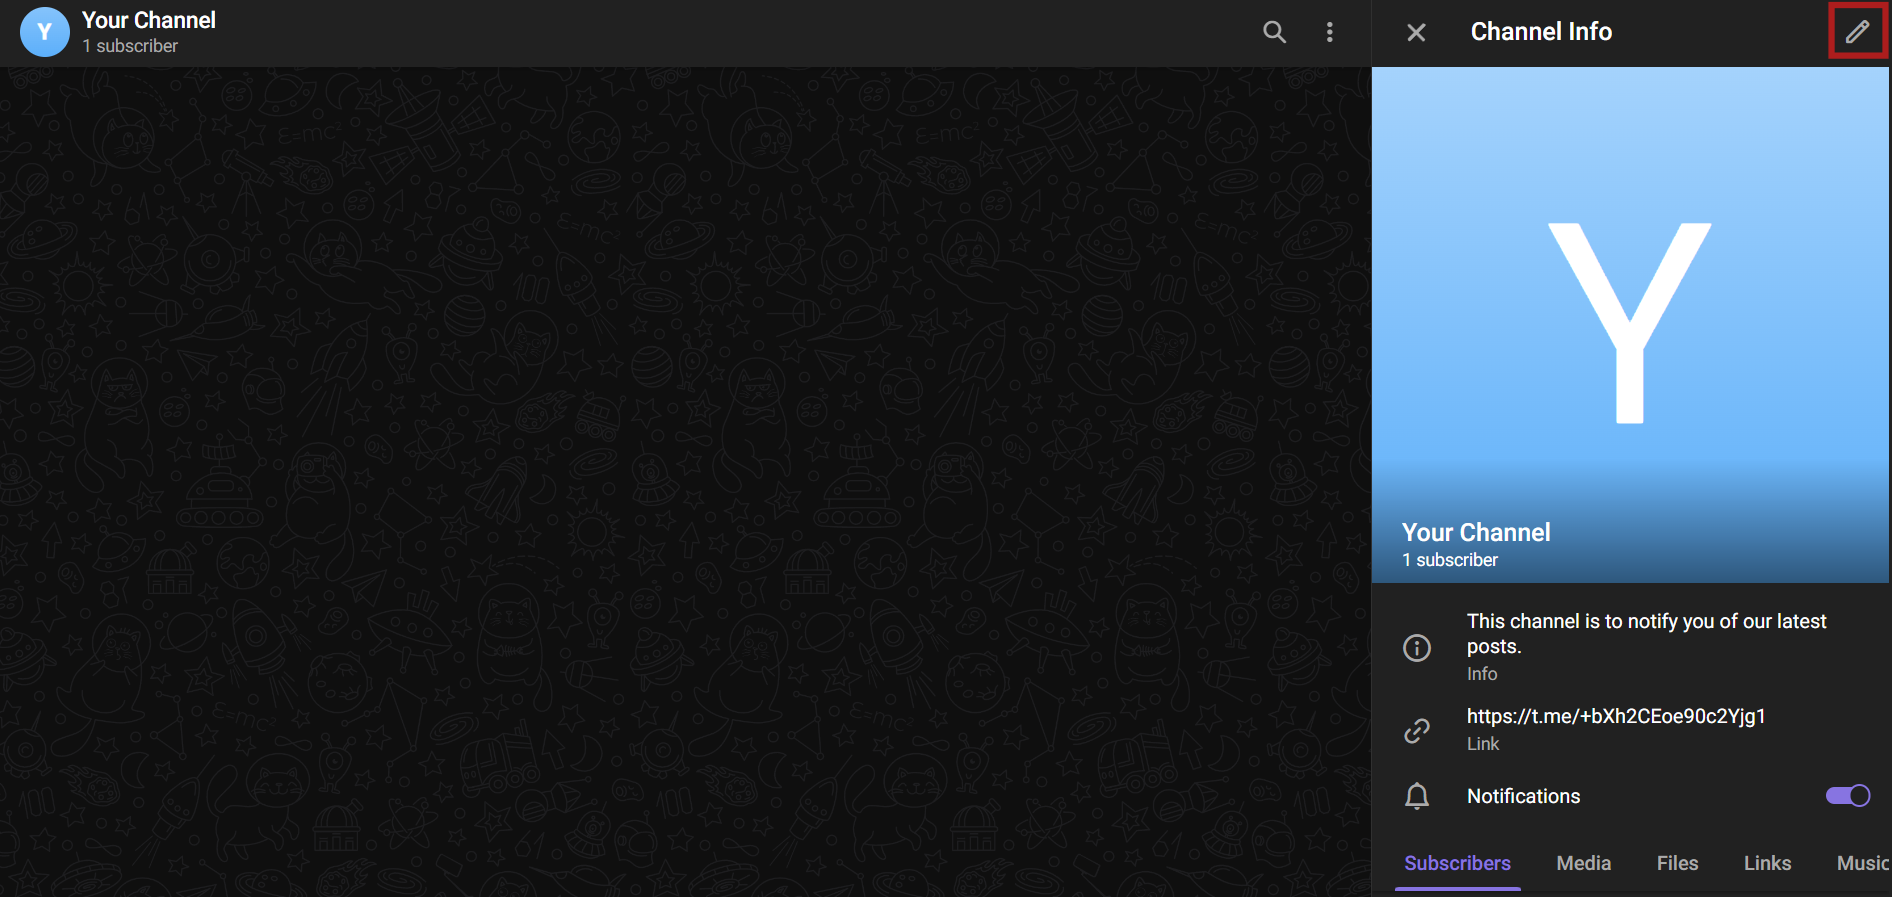
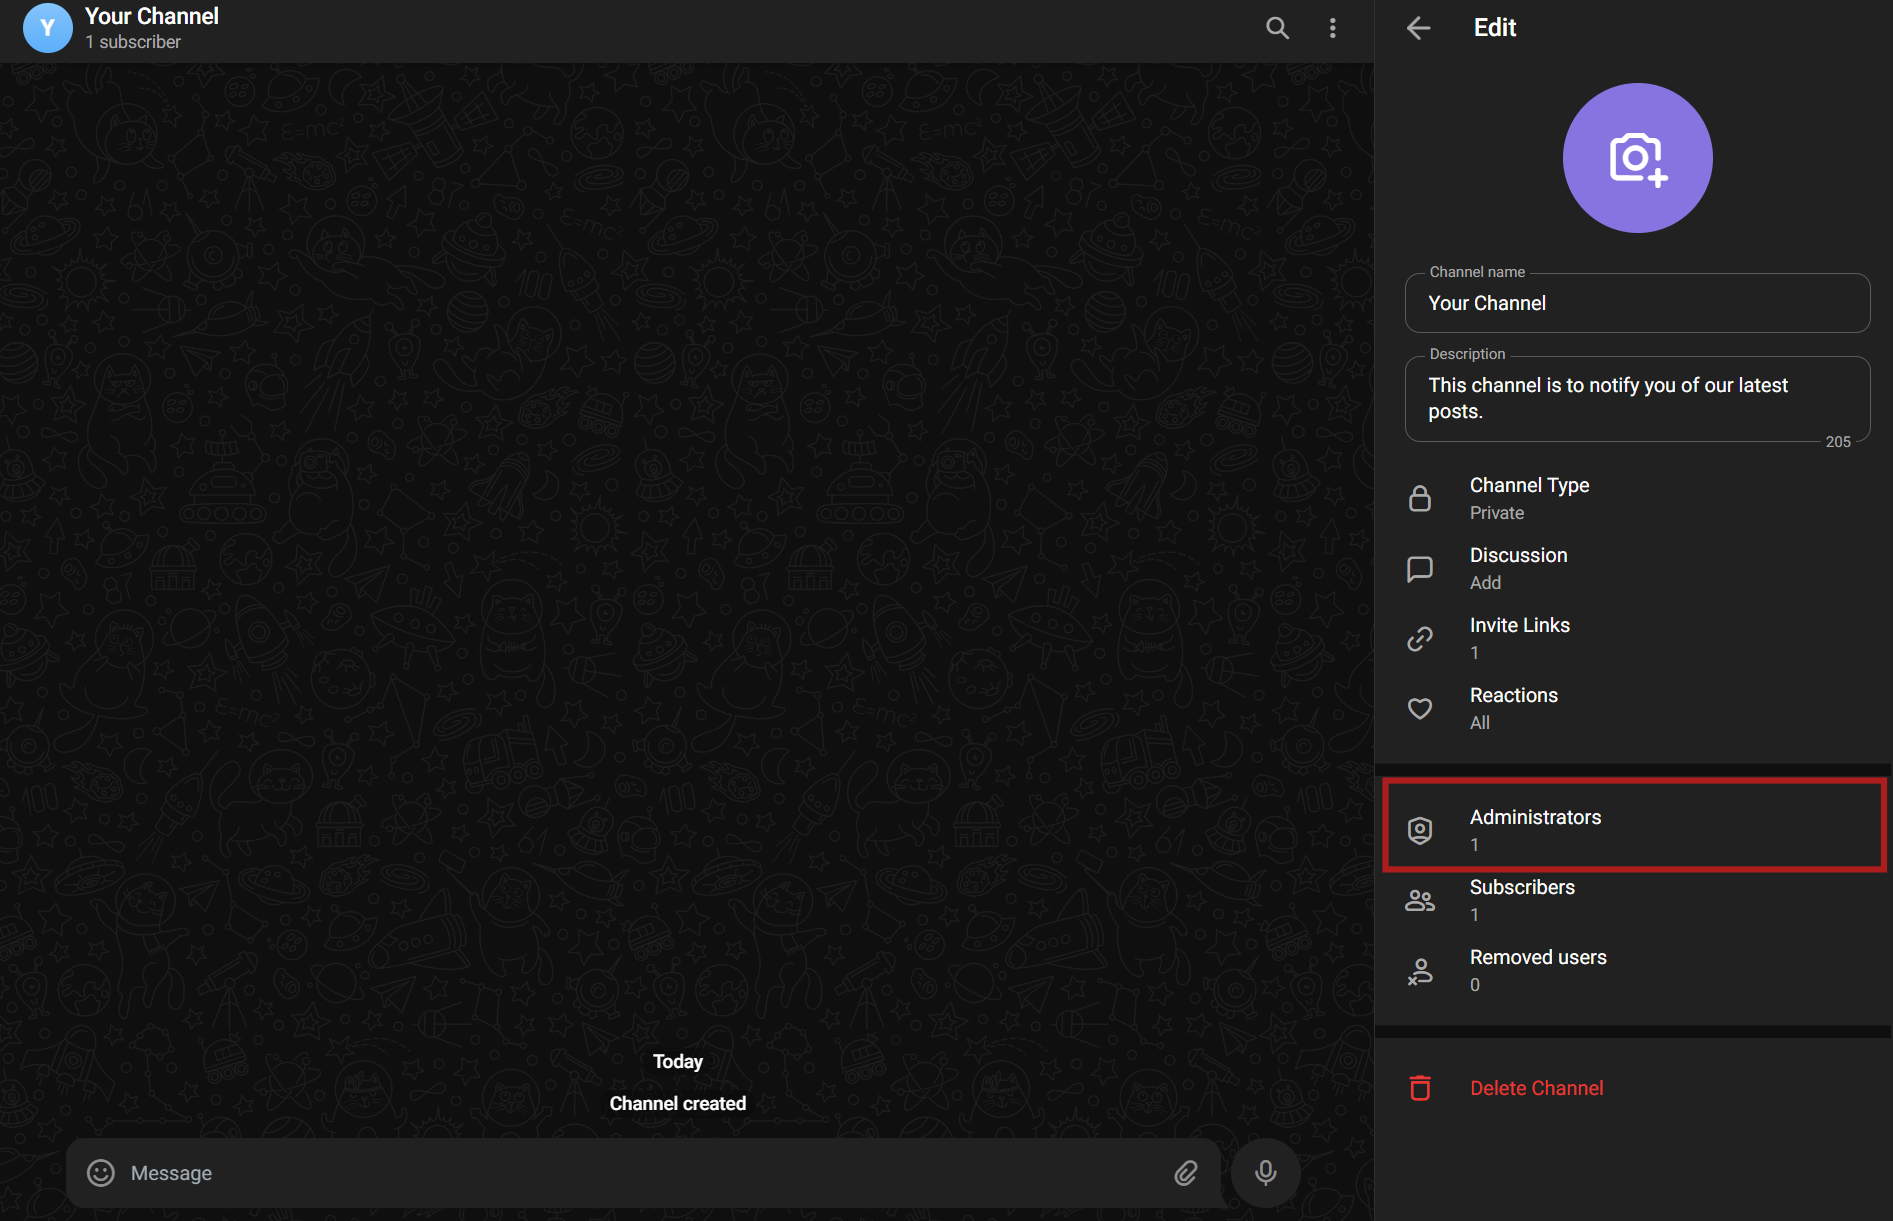
Next, click on "Administrators", which will bring up all the accounts that have admin access to your channel.
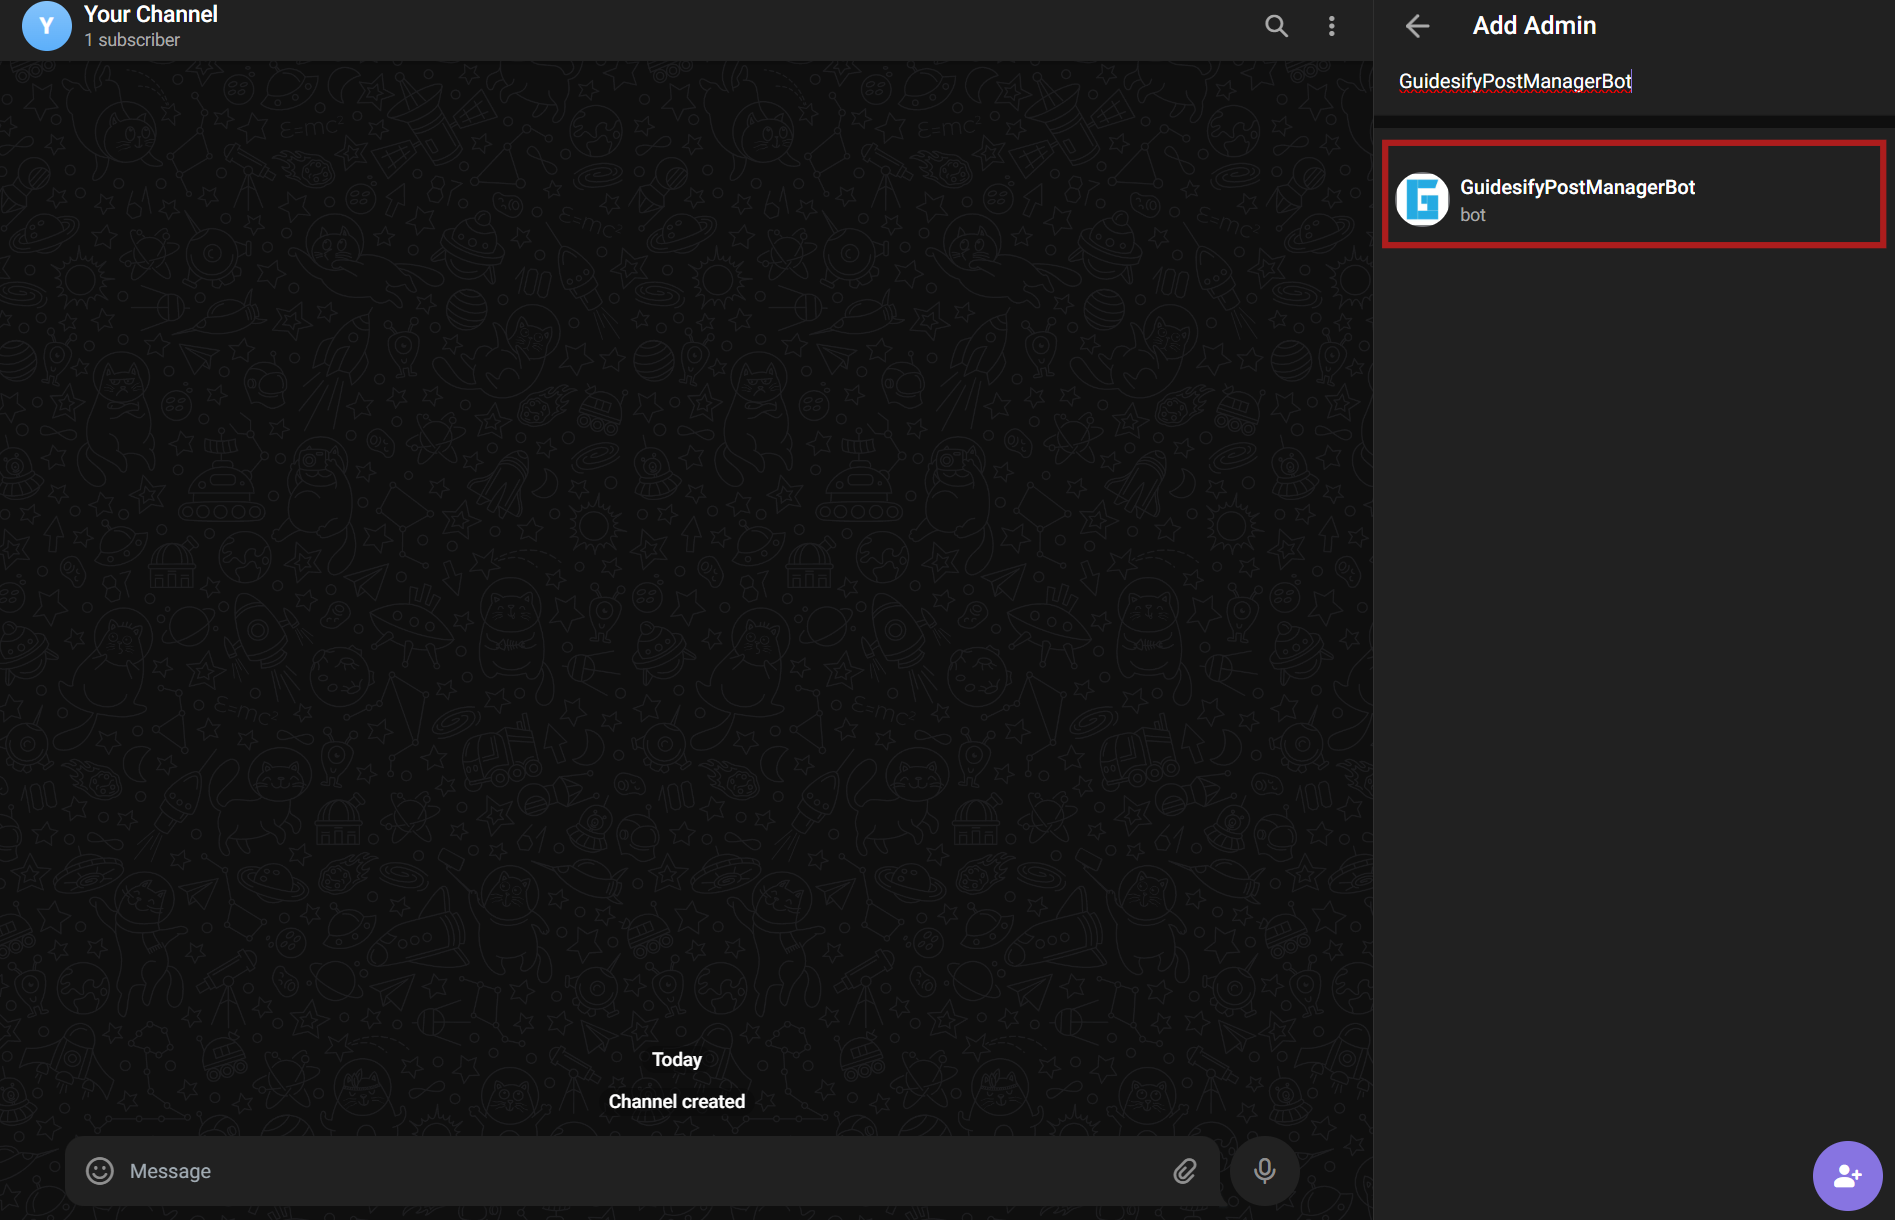
At the same page where you see all the accounts with admin access, click on the icon on the bottom right to add a new administrator. In the search bar, enter "GuidesifyPostManagerBot" or paste the following handle: @guidesify_wp_bot into the search bar then click on the bot that is named "GuidesifyPostManagerBot" to add our bot into your channel.
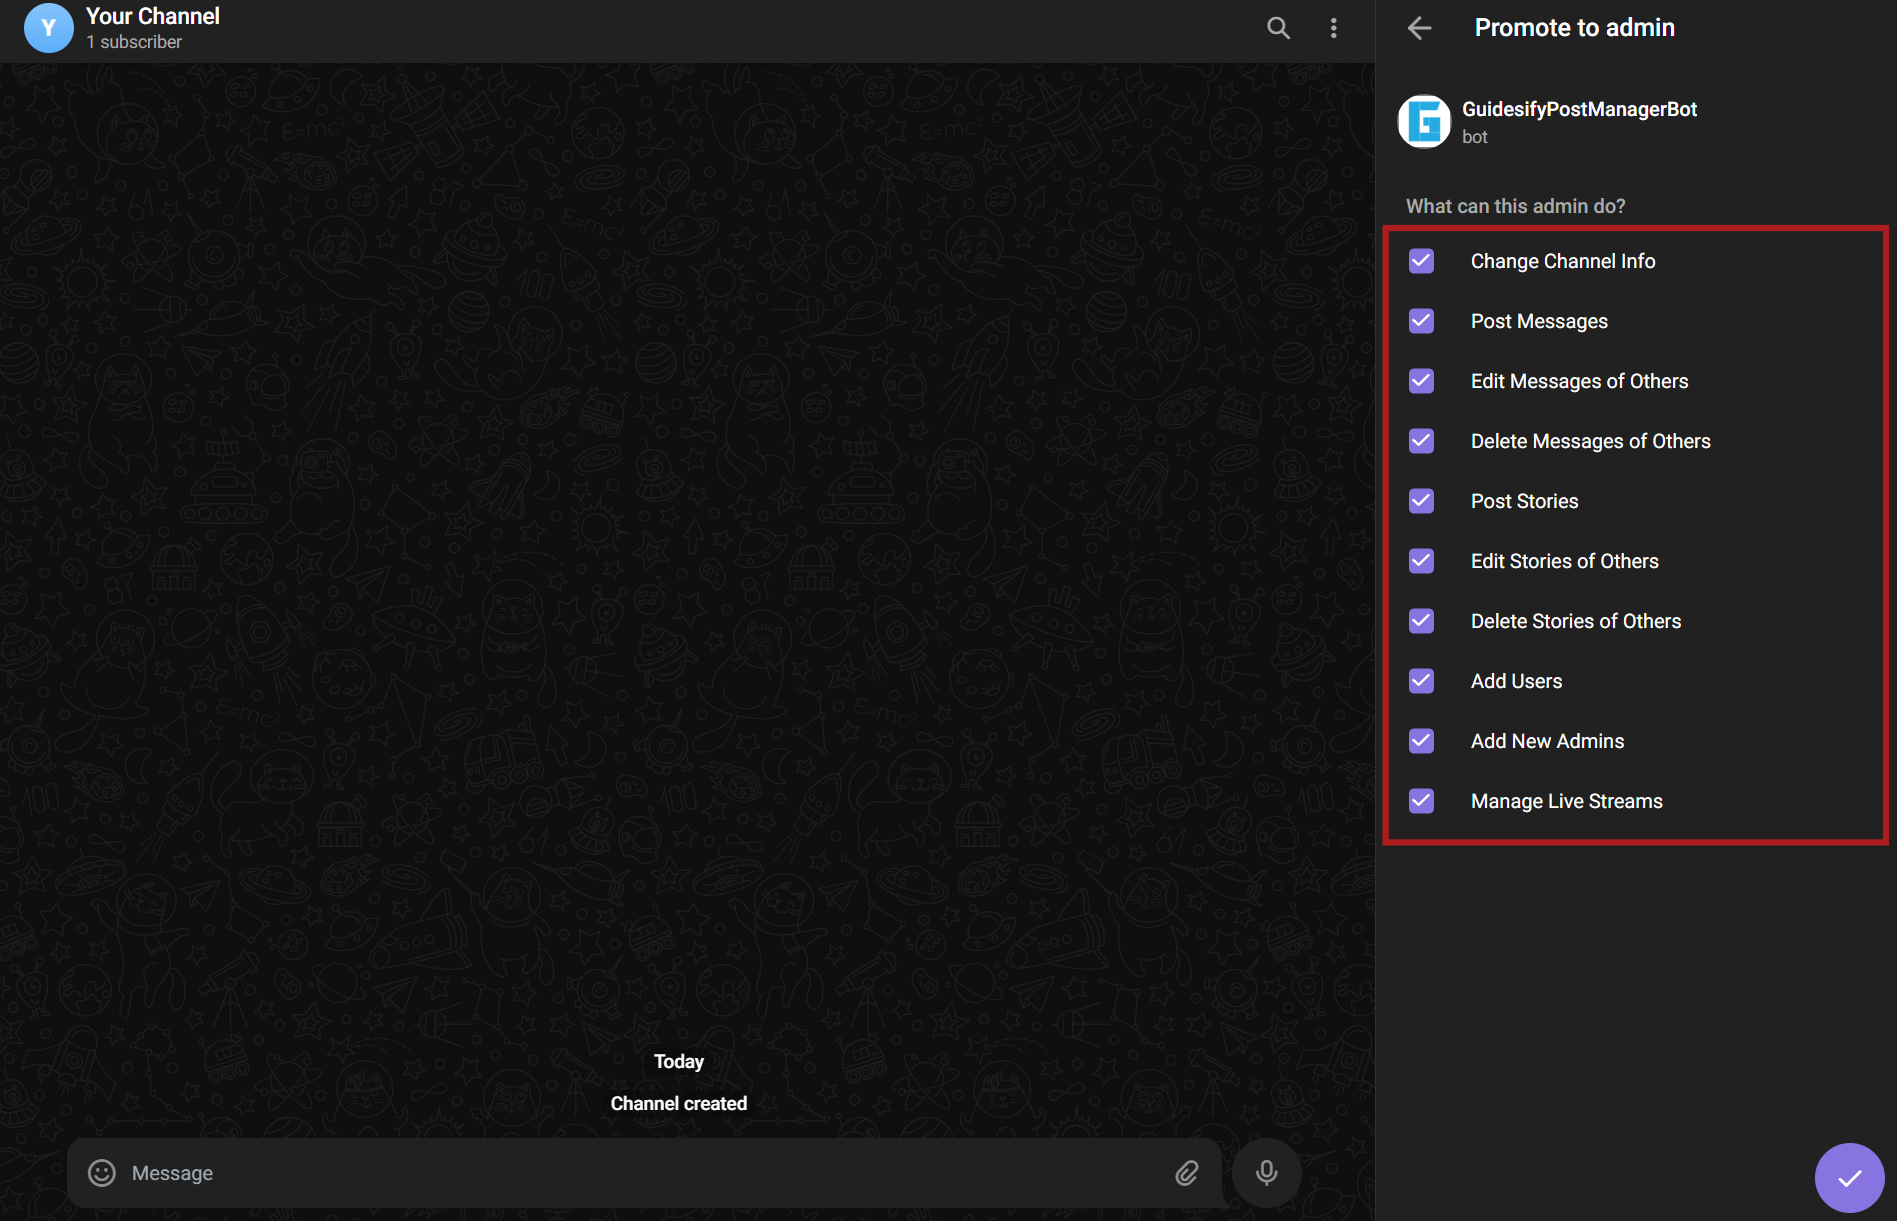
You will then be prompted to set the permissions for the bot. Please leave all the boxes ticked to avoid errors. Once you have ensured that all boxes have been ticked, click on the check icon on the bottom right of the page.
At this point, you will see our bot under "Administrators" which means we can now add your telegram channel to the post manager.
Telegram Channel ID
Your next step is to get your Telegram Channel ID. While on Telegram Web, on your computer, look at the current URL web browser while your channel is being actively selected.
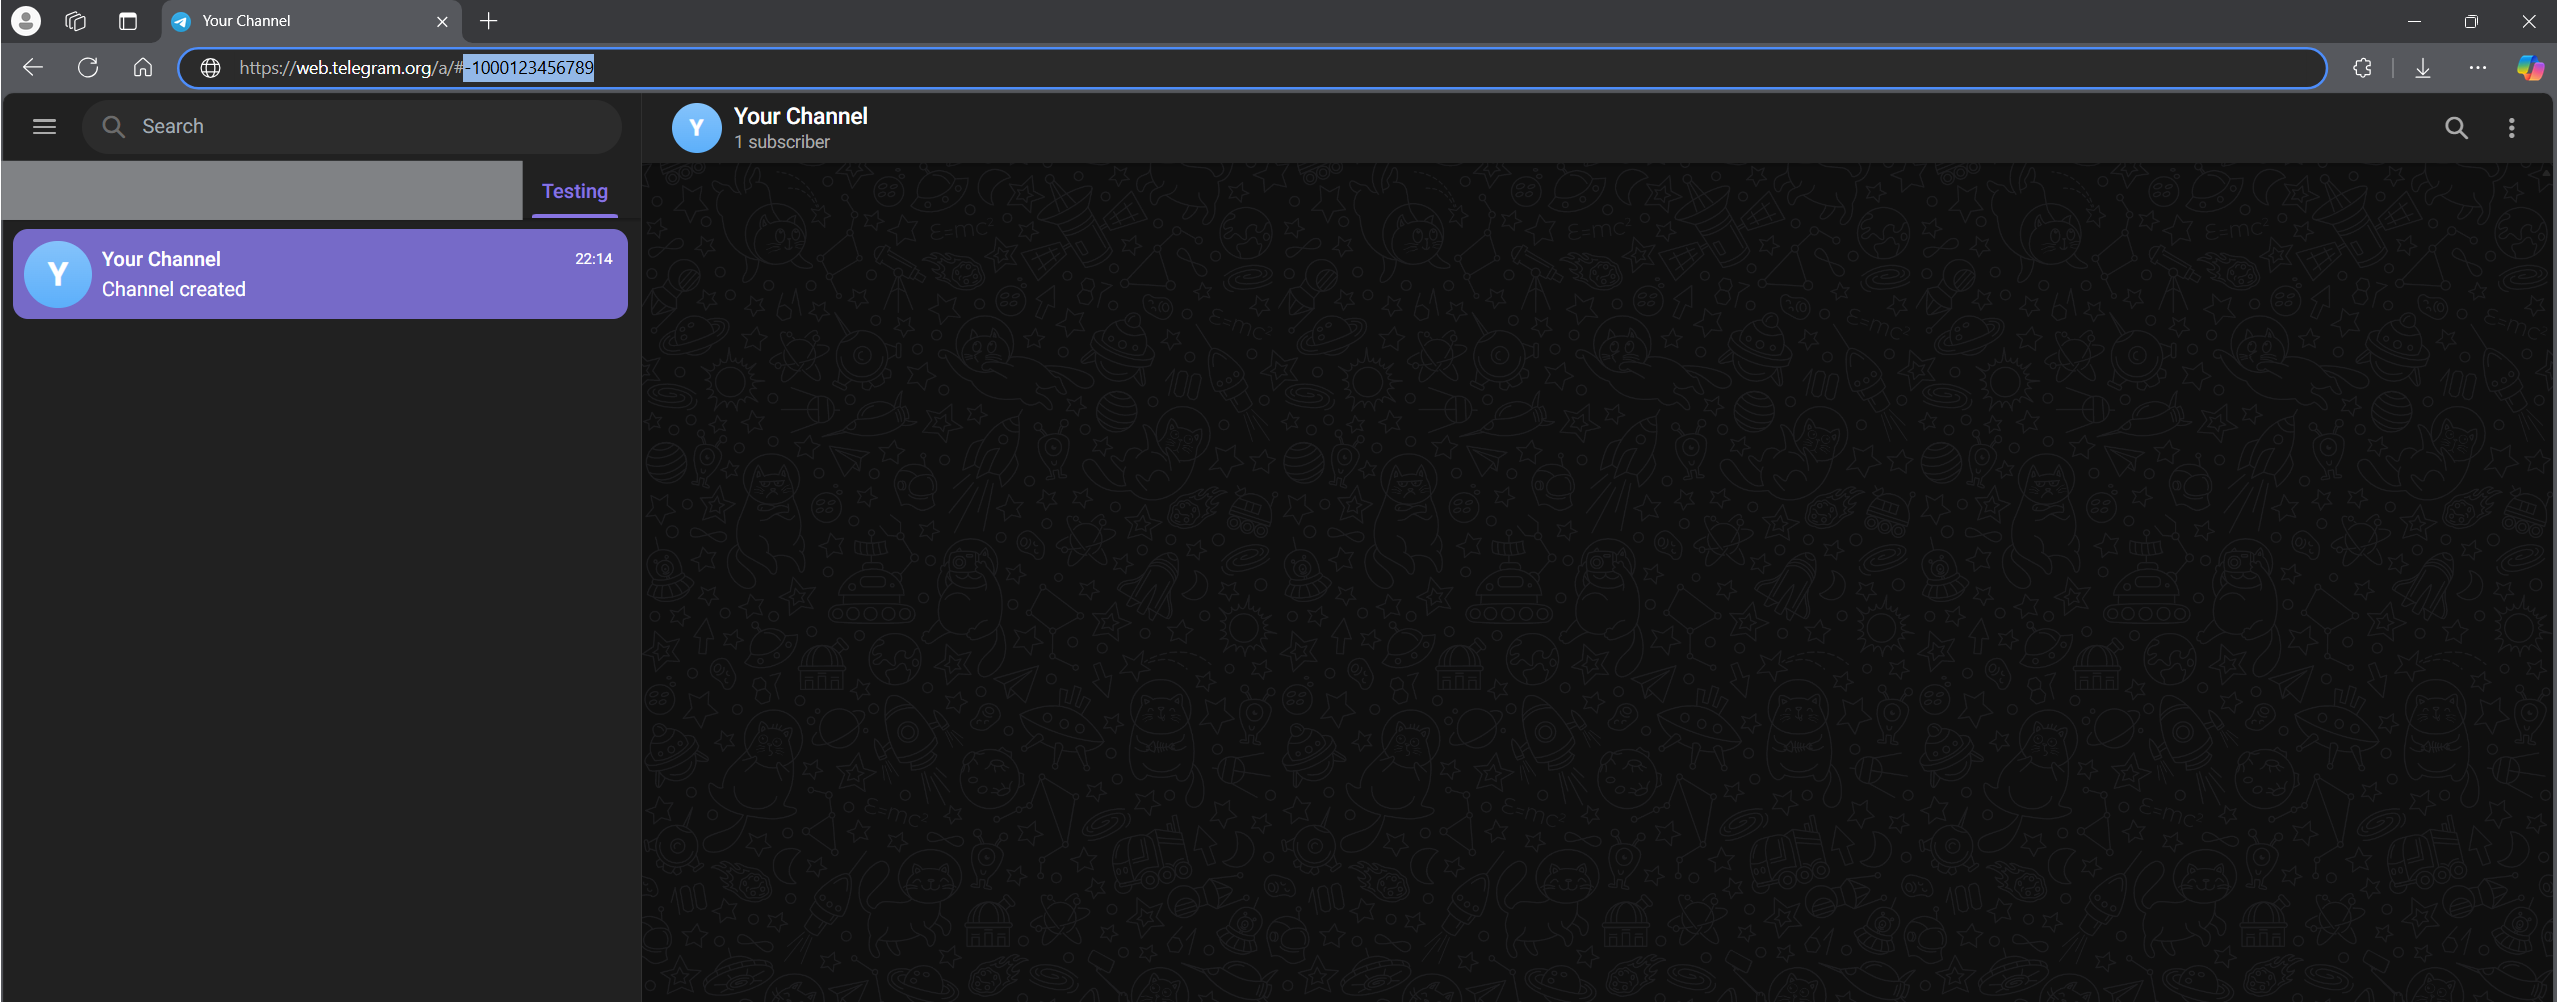
Your channel ID consists of a "-" character and 13 digits, such as: -1000123456789. Copy this (ensure that you include the "-" character) into the appropriate field in the app.
Telegram Channel Handle
Your Telegram Channel Handle is entirely up to you. It is simply a name that our bot will refer to when creating the Telegram post to notify your channel's subscribers of a new post. This will be useful when these messages are forwarded around to different group chats or people.
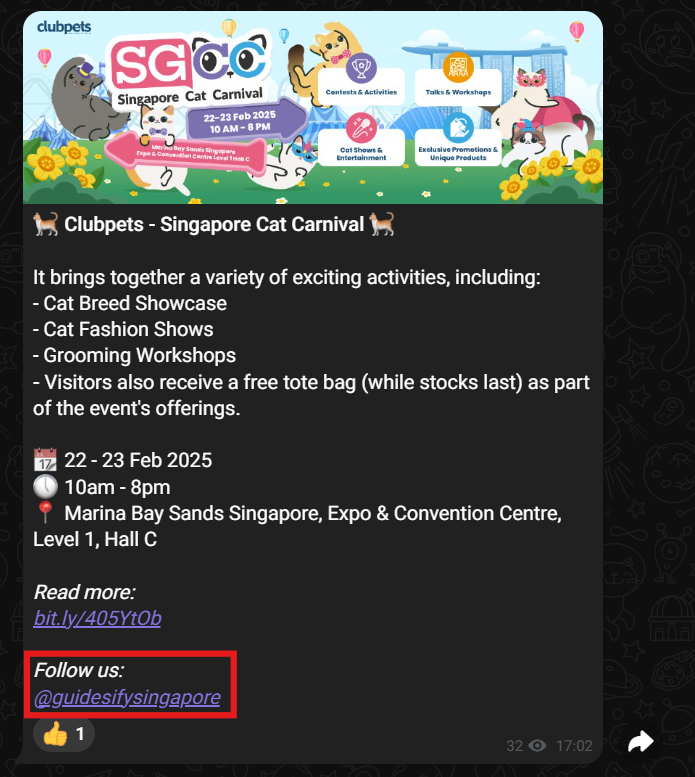
In our case, we used the handle "guidesifysingapore". Do not add a "@" character in front of your handle as our bot will automatically add that. For example, you can add "yourchannel" as the handle. To view a live example of our Telegram integration, visit our channel here.
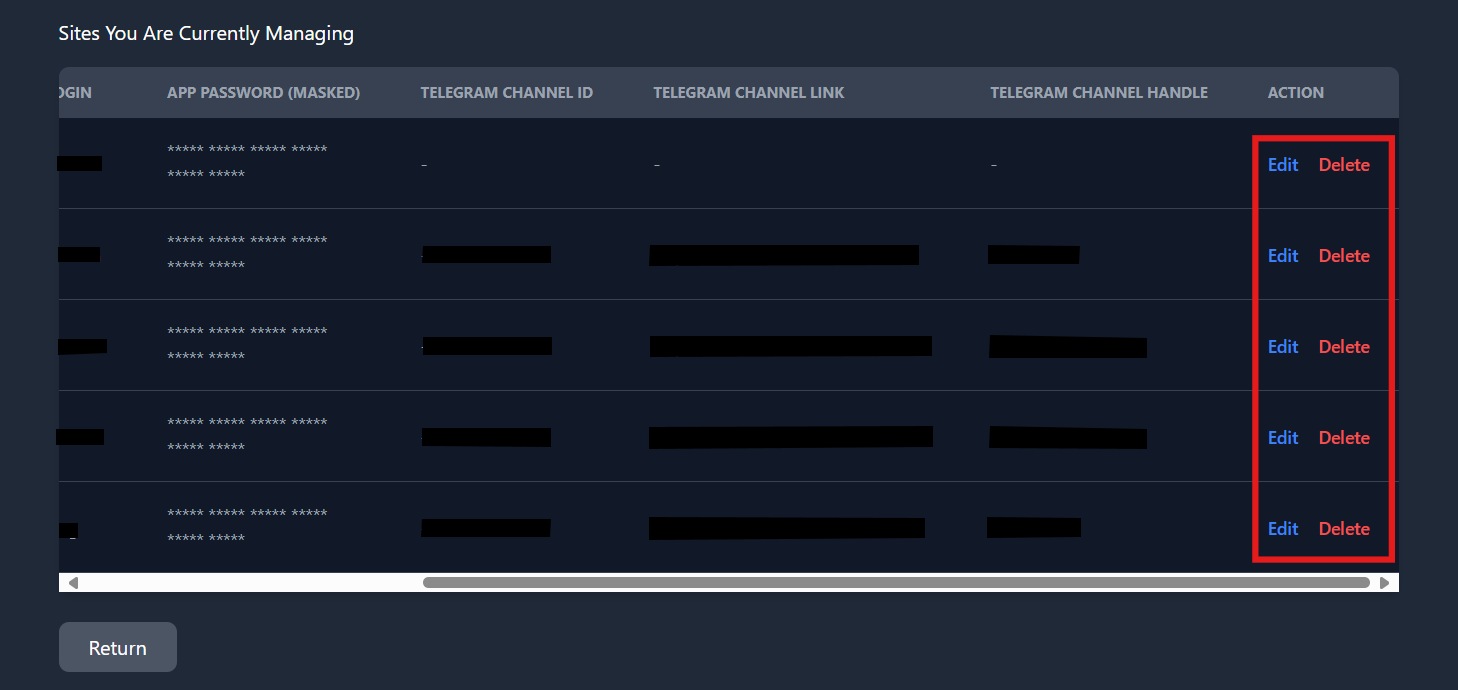
Editing & Deleting Sites
To edit the site you are currently managing, click on the "Edit" button on the site you want to make any edits to.
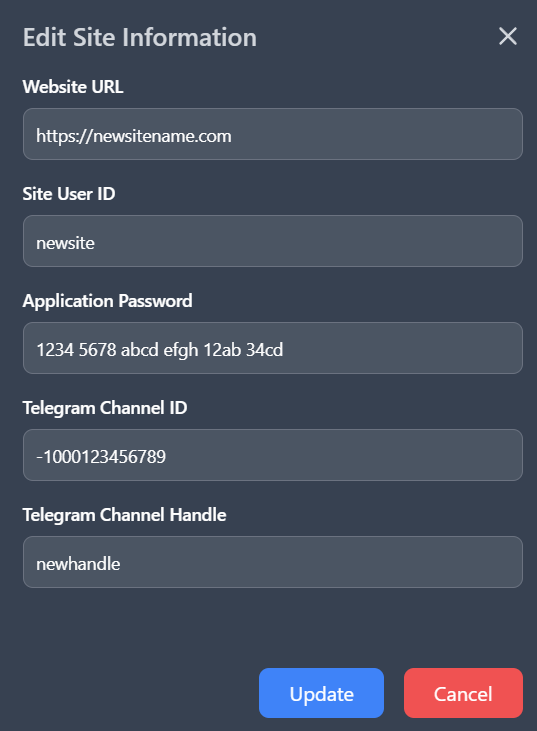
Clicking on the "Edit" button will open a pop-up to let you edit the existing details of the site. Take note that you will be prompted to re-enter your site's Application Password so ensure that you have that ready in order for your changes to go through. Once you've made the necessary changes, click on "Update". Ensure that all new credentials are valid for the edits to go through.
To delete a site, simply click on the "Delete" button for the site that you want to stop managing. Take note that any deletion is final and irrecoverable and you will have to re-enter the site information if you wish to add that site back into the list of sites you manage.
Creating a New Post
There are 2 methods to creating a post in this app, either by manually writing one or by using our AI writer. Writing manually and posting it to your WordPress site is free but using our AI writer will cost you credits.
Writing Without AI
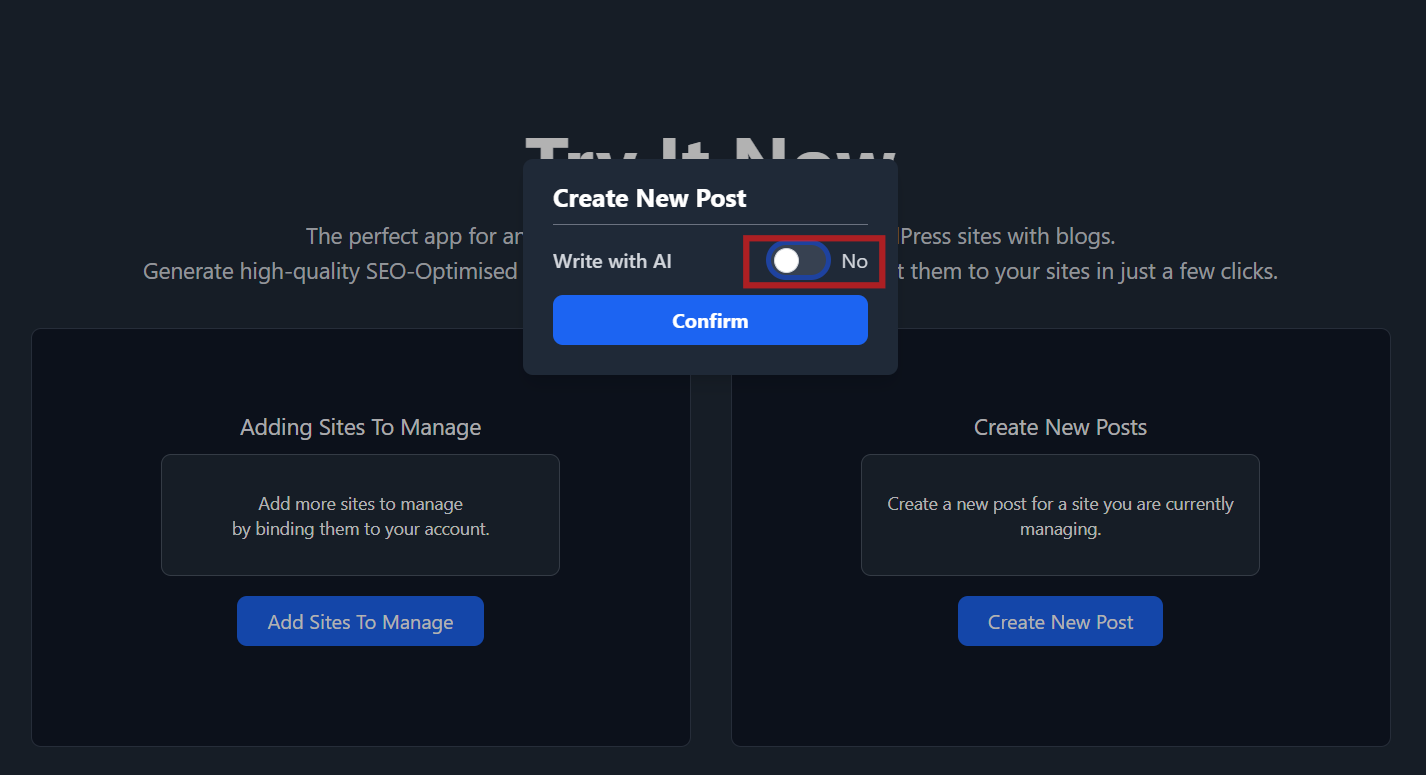
If you intend to manually write an article, click on the "Create New Post" button and leave the "Write with AI" option to be unselected.
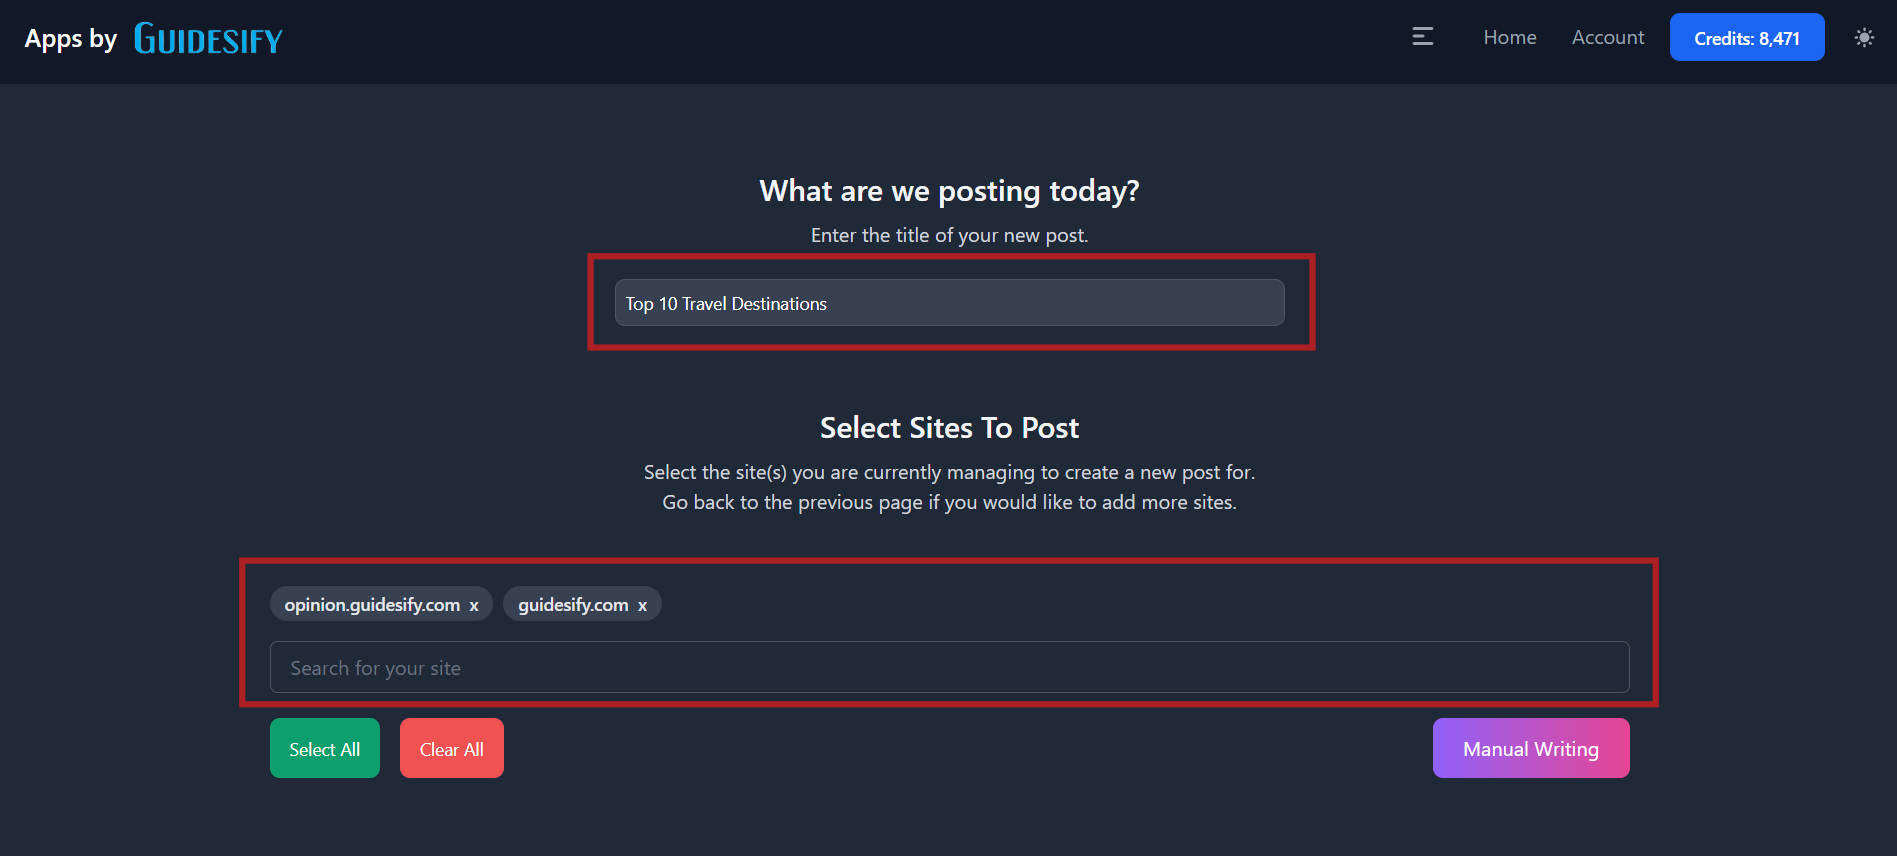
Input the title of your new article and select the site(s) where you want your new article to be posted to. Once done, click on the "Manual Writing" button.
You will now then write your article. First, click the "Choose File" button to add an image from your computer. Take note that all posts are required to have a featured image.
To write your article, you can use our text editor or copy and paste your article from outside sources such as Google Docs, Microsoft Word and so on. Our text editor offers you the basic formatting tools such as Bold, Italic, and more. You can also add images (and resize them) by copying and pasting them from any source that you have.
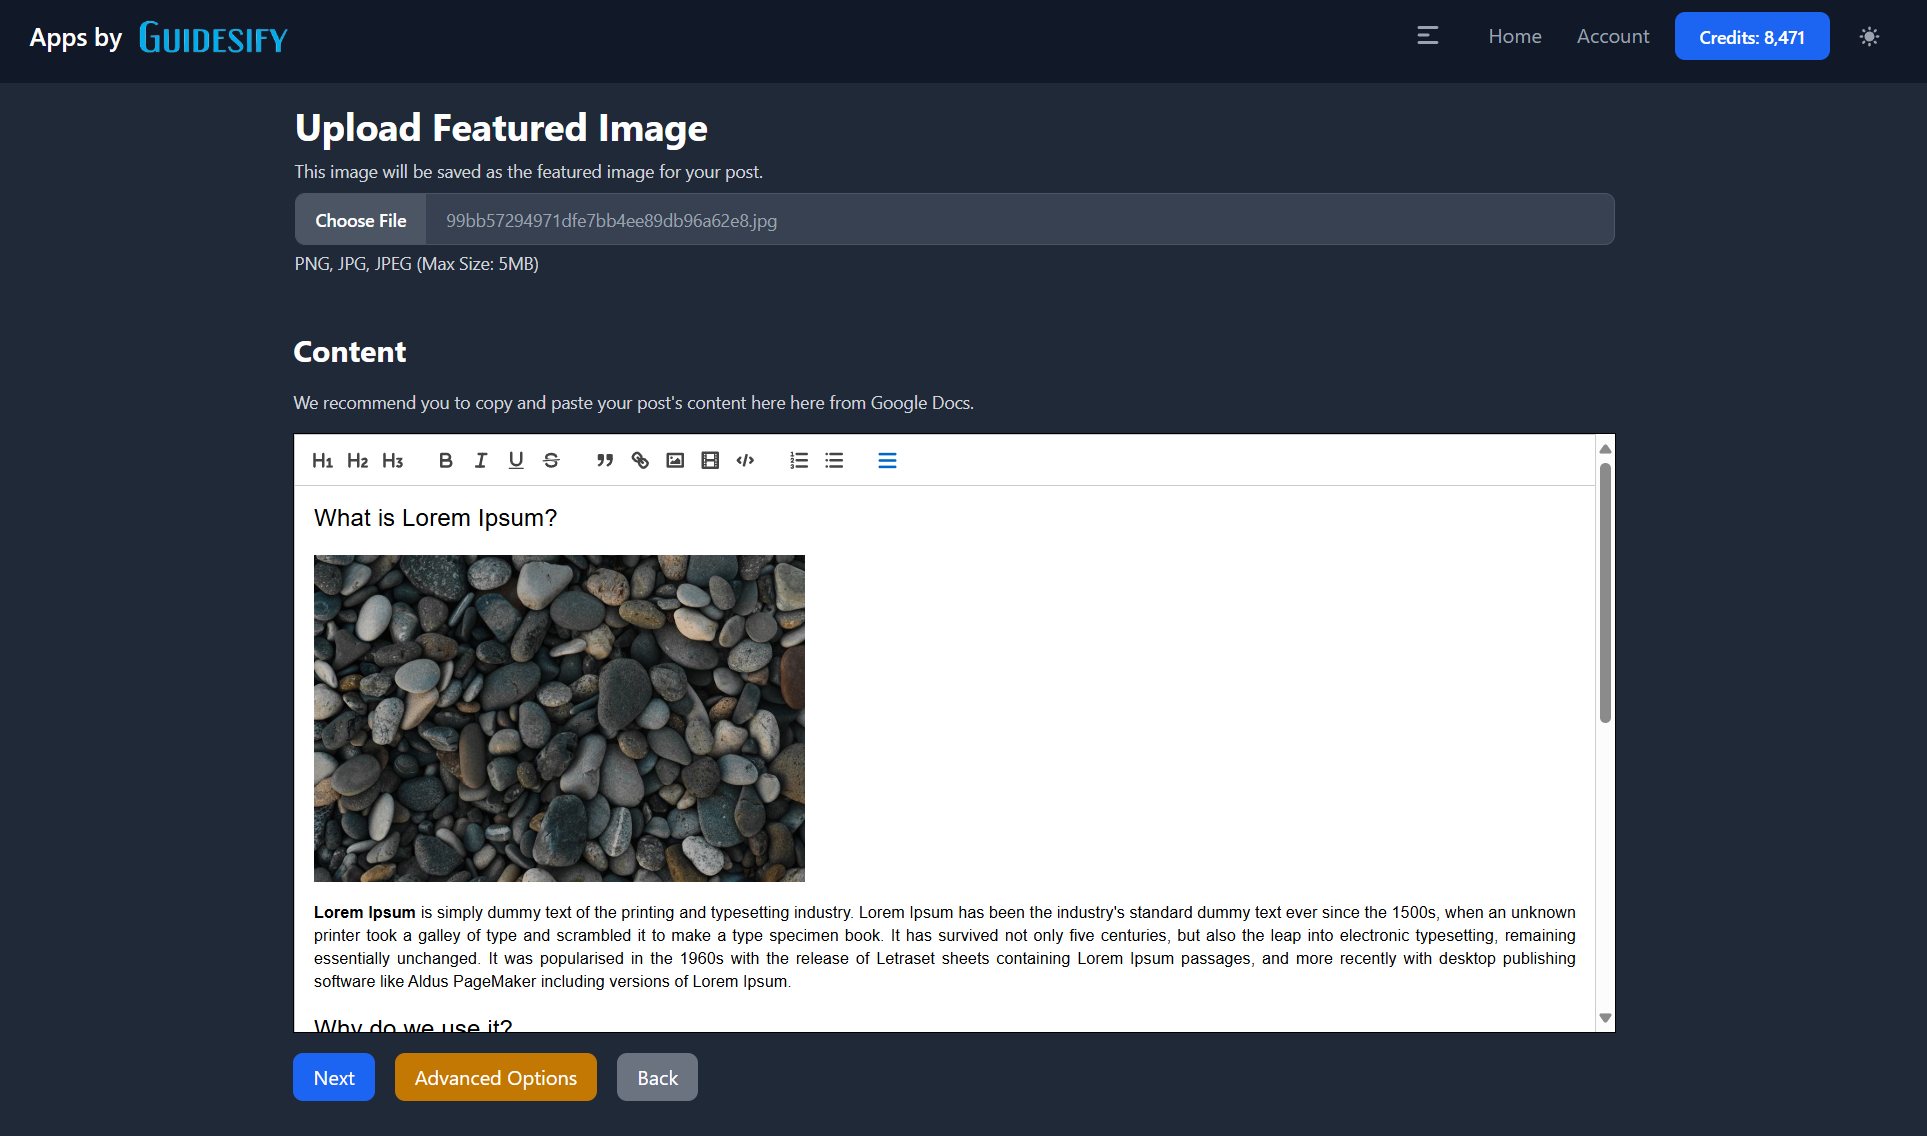
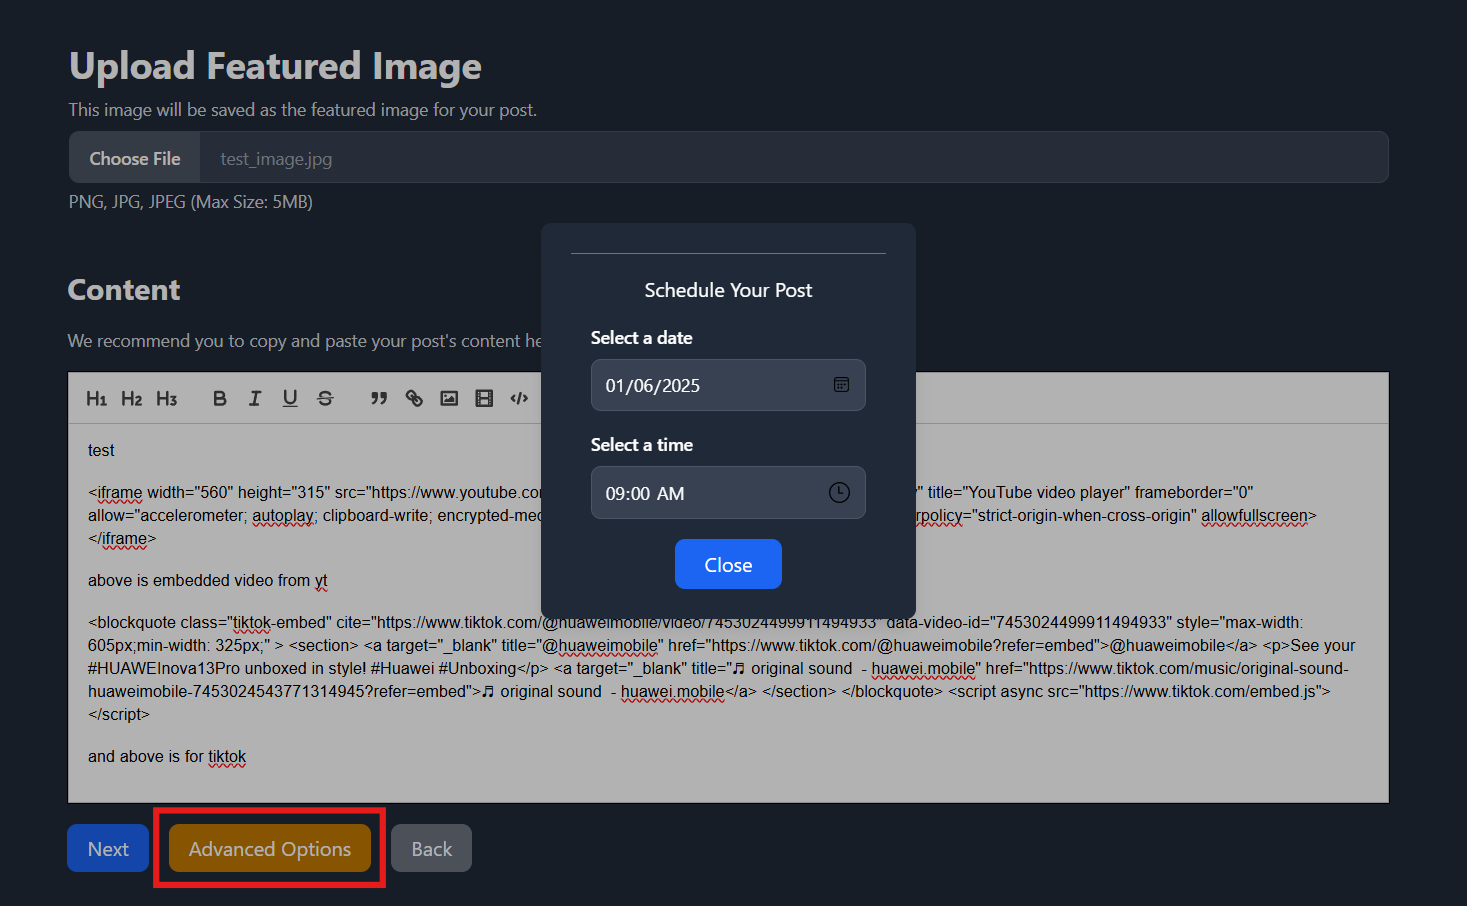
Should you need to schedule your posts or backdate them, clicked on "Advanced Options" and your posts will be scheduled or backdated accordingly.
Once you are ready, you can click on "Next", where if your post has no images, your post will begin to be posted to the site(s) you have selected. However, if you have some images in your post, clicking on "Next" will bring you to the page where you can rename your images.
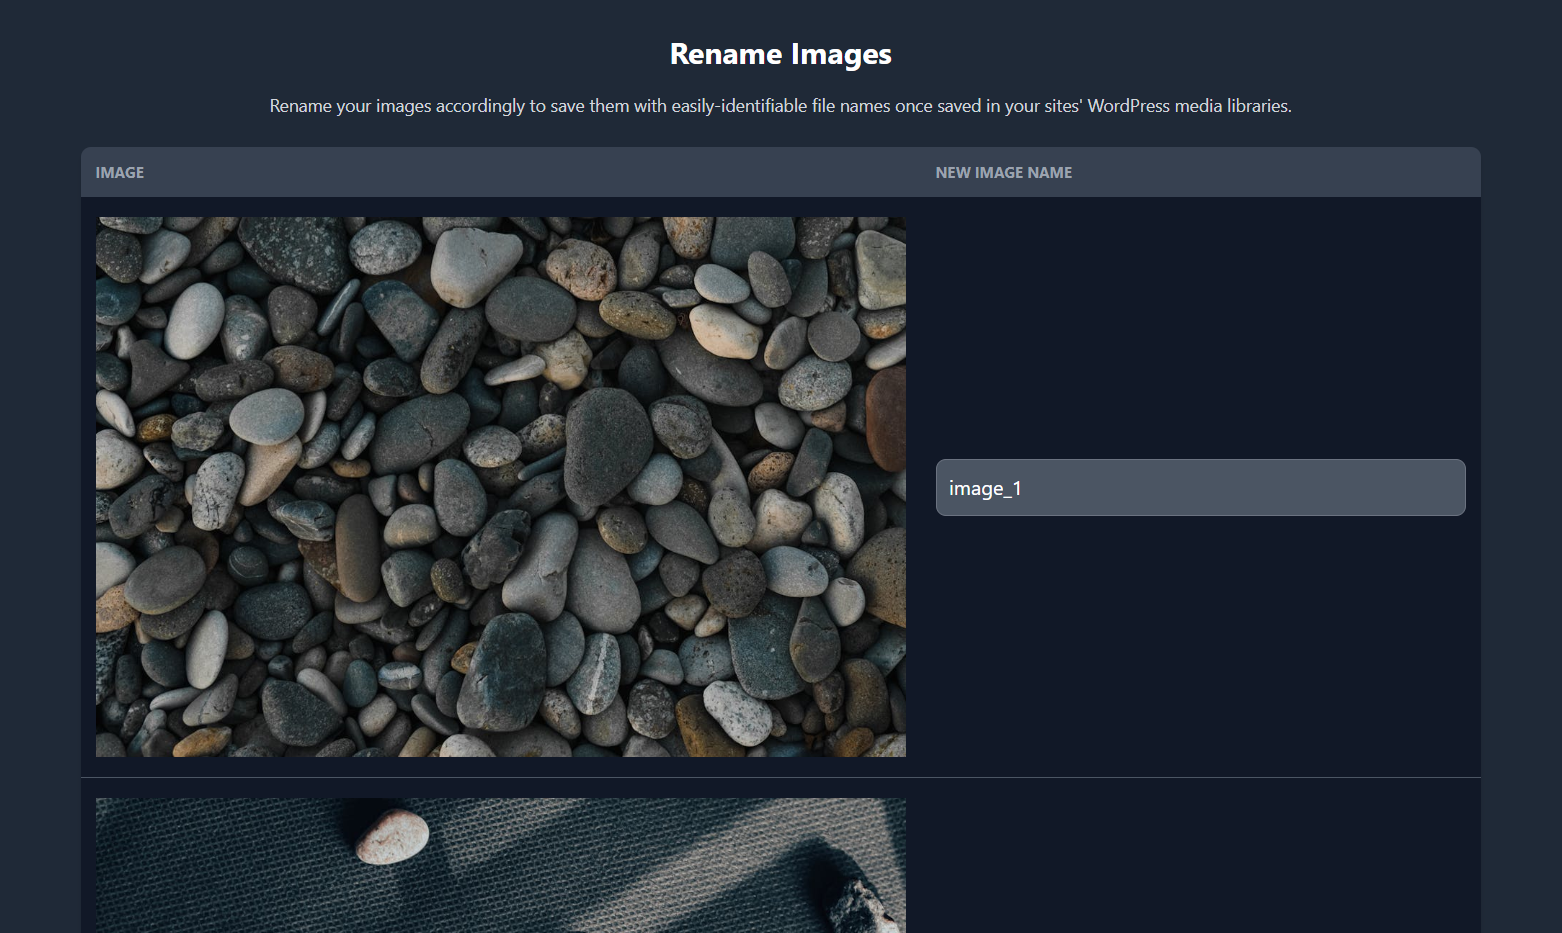
Images will be stored in your WordPress media library based on the names you have given them.
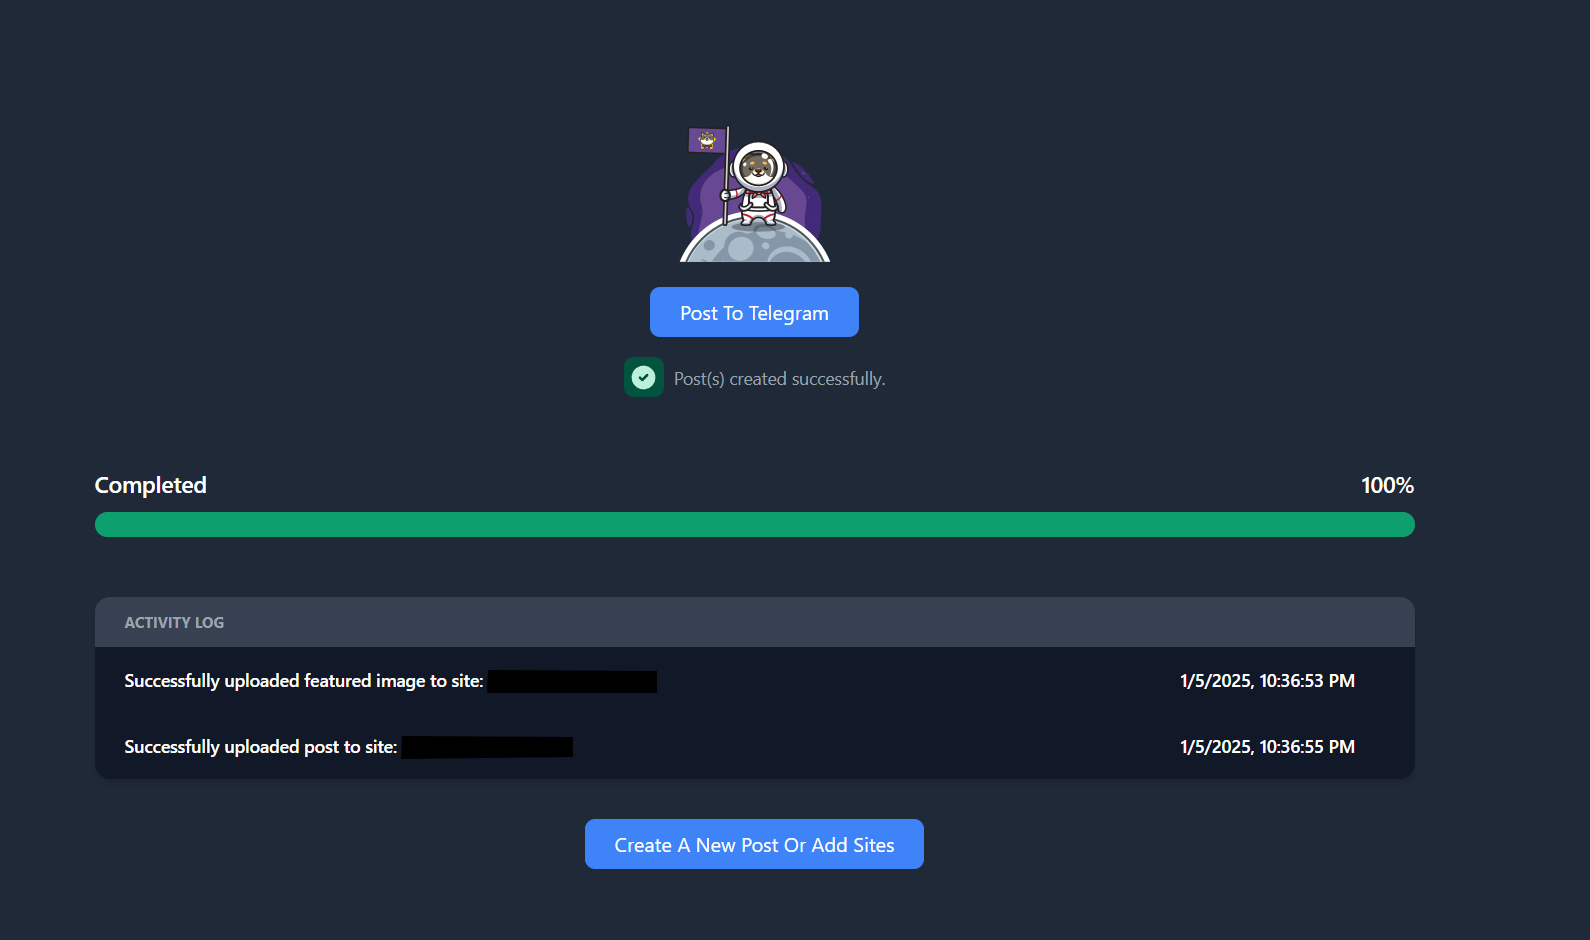
Once your post has been successfully posted to your selected site(s), you can either exit, create a new post, or if you have integrated your Telegram channel into this app, you can proceed to click on "Post to Telegram" and our bot will send a message regarding your post to your Telegram channel.
Embedding YouTube Videos
If you would like to embed videos from YouTube, you will need to do the following to obtain the video's HTML block:
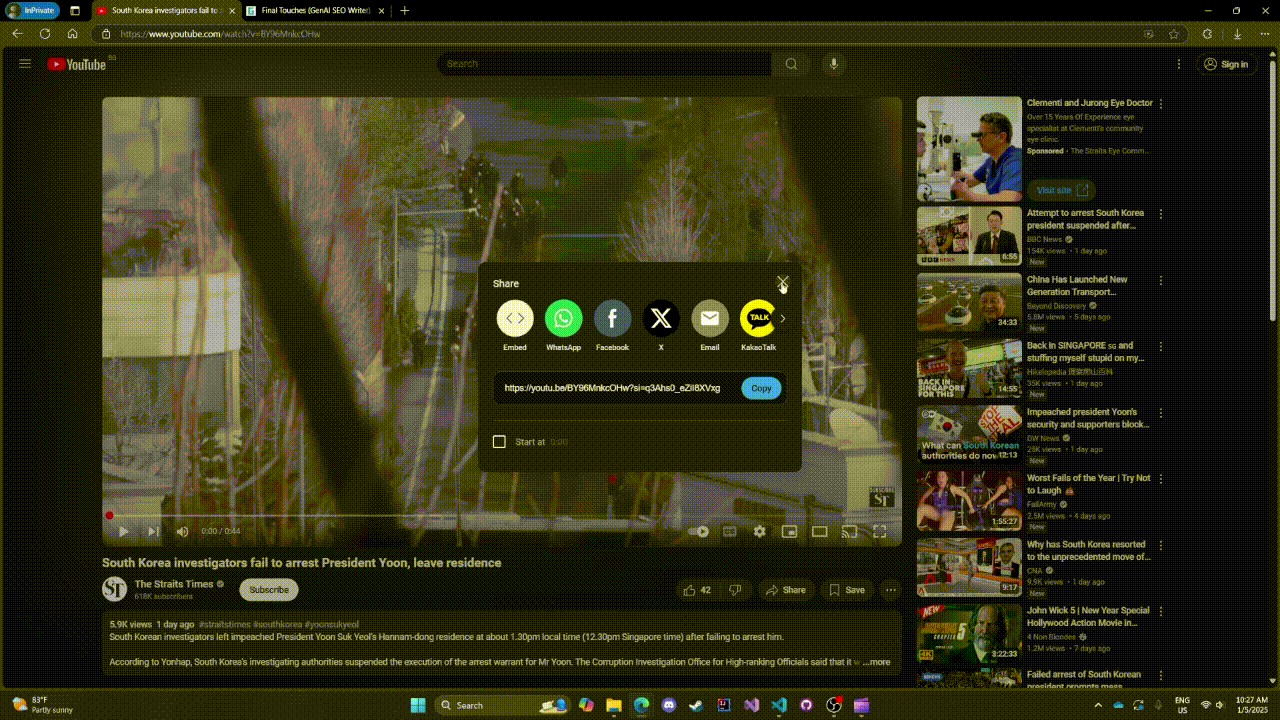
After pasting that HTML block, when posted, it will look like a properly embedded video.
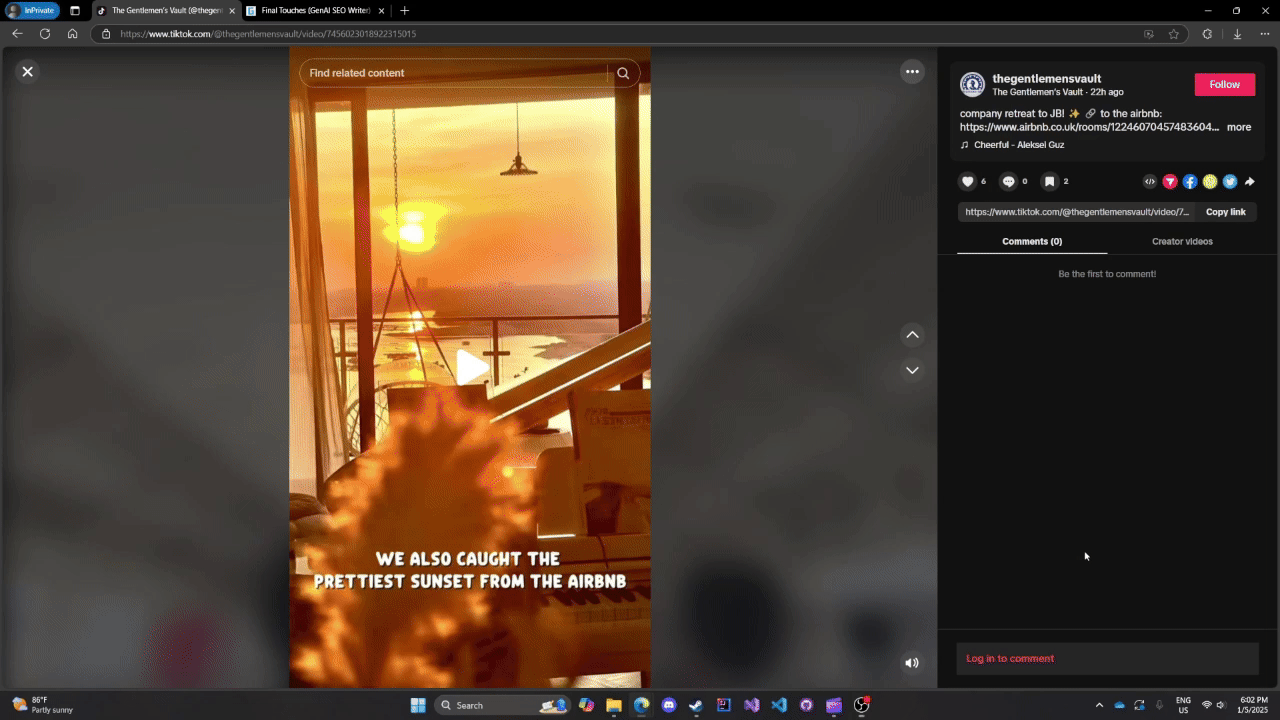
Embedding TikTok Videos
For TikTok videos, you will need to follow a process similar to embedding a YouTube video:
Writing With AI
We offer 2 options if you'd like to write an article with AI, the normal mode or the Sniper mode, which we will explain below.
Normal Mode
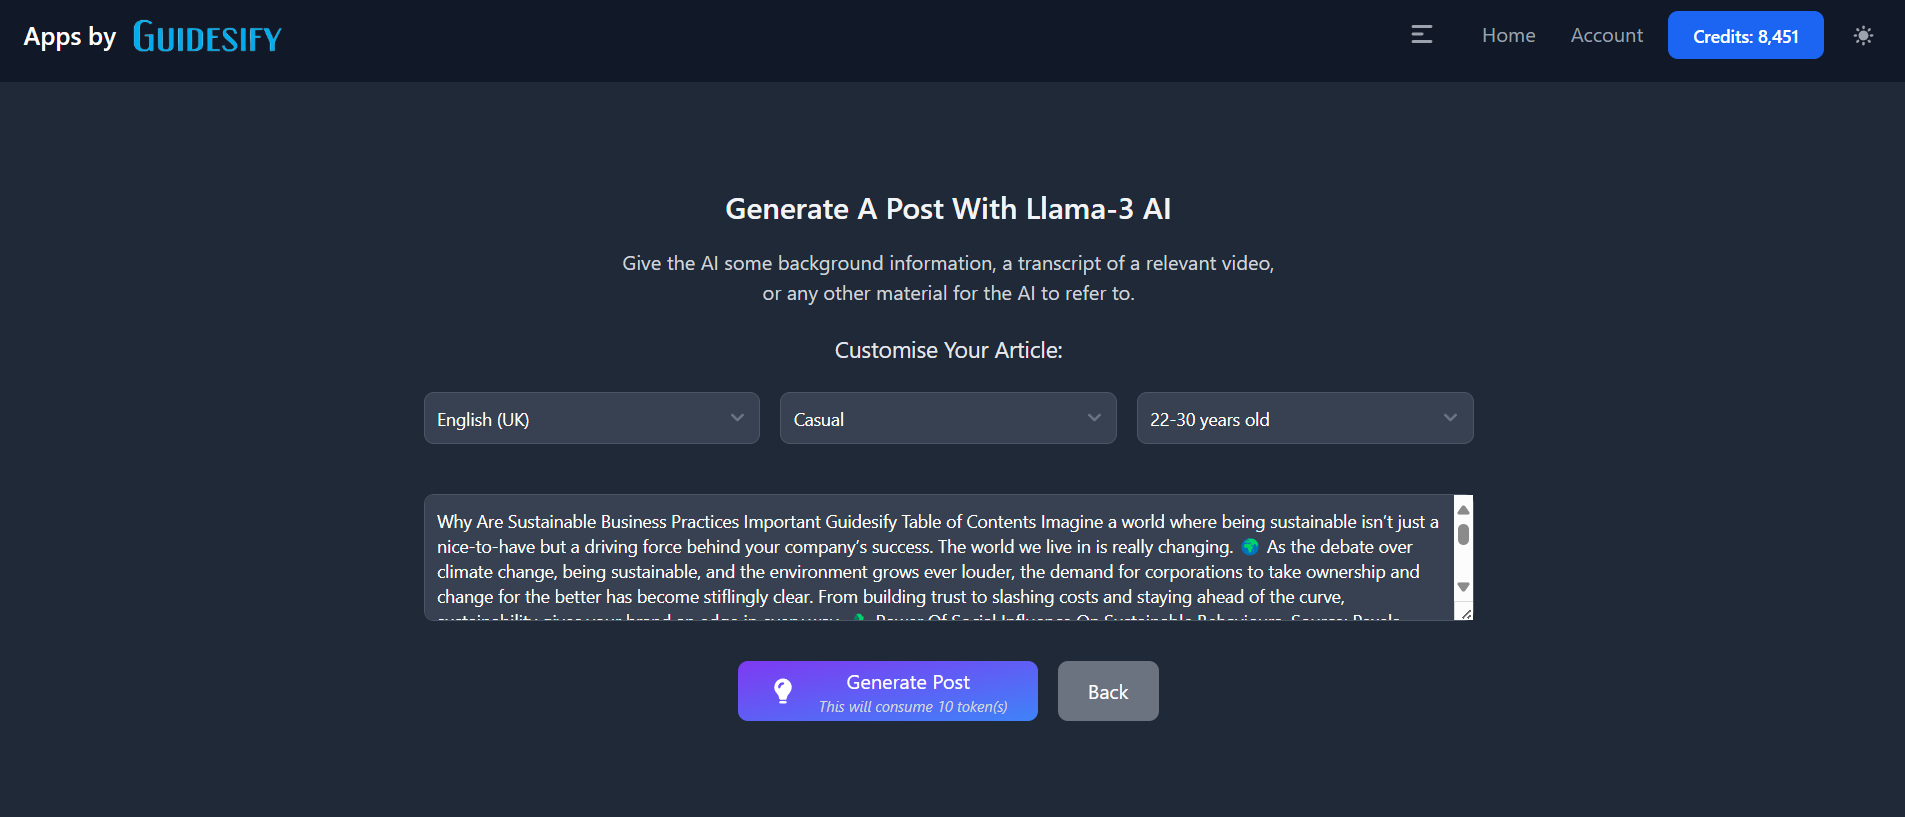
In this mode, you will provide your own context for the AI to generate an article based on. First write an appropriate title in the field and select the site(s) you would like the article to be posted to. The title will be factored in by the AI when generating an article, so pick an appropriate title for the best experience. Once done, click on "Write With AI".
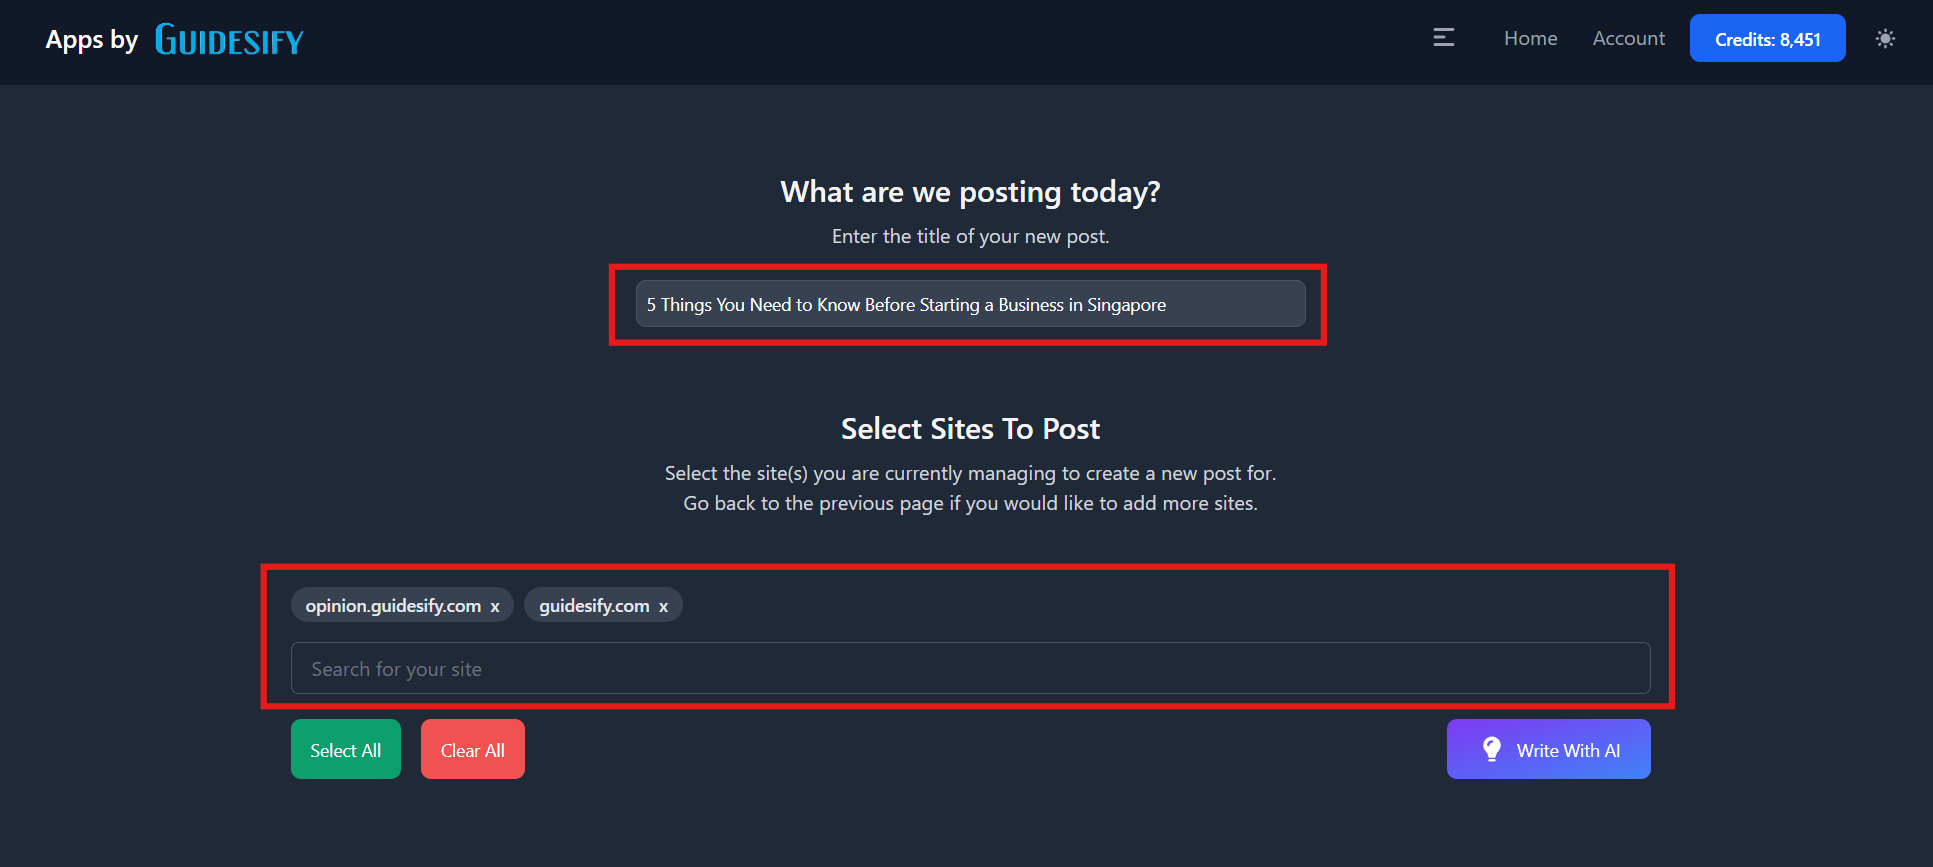
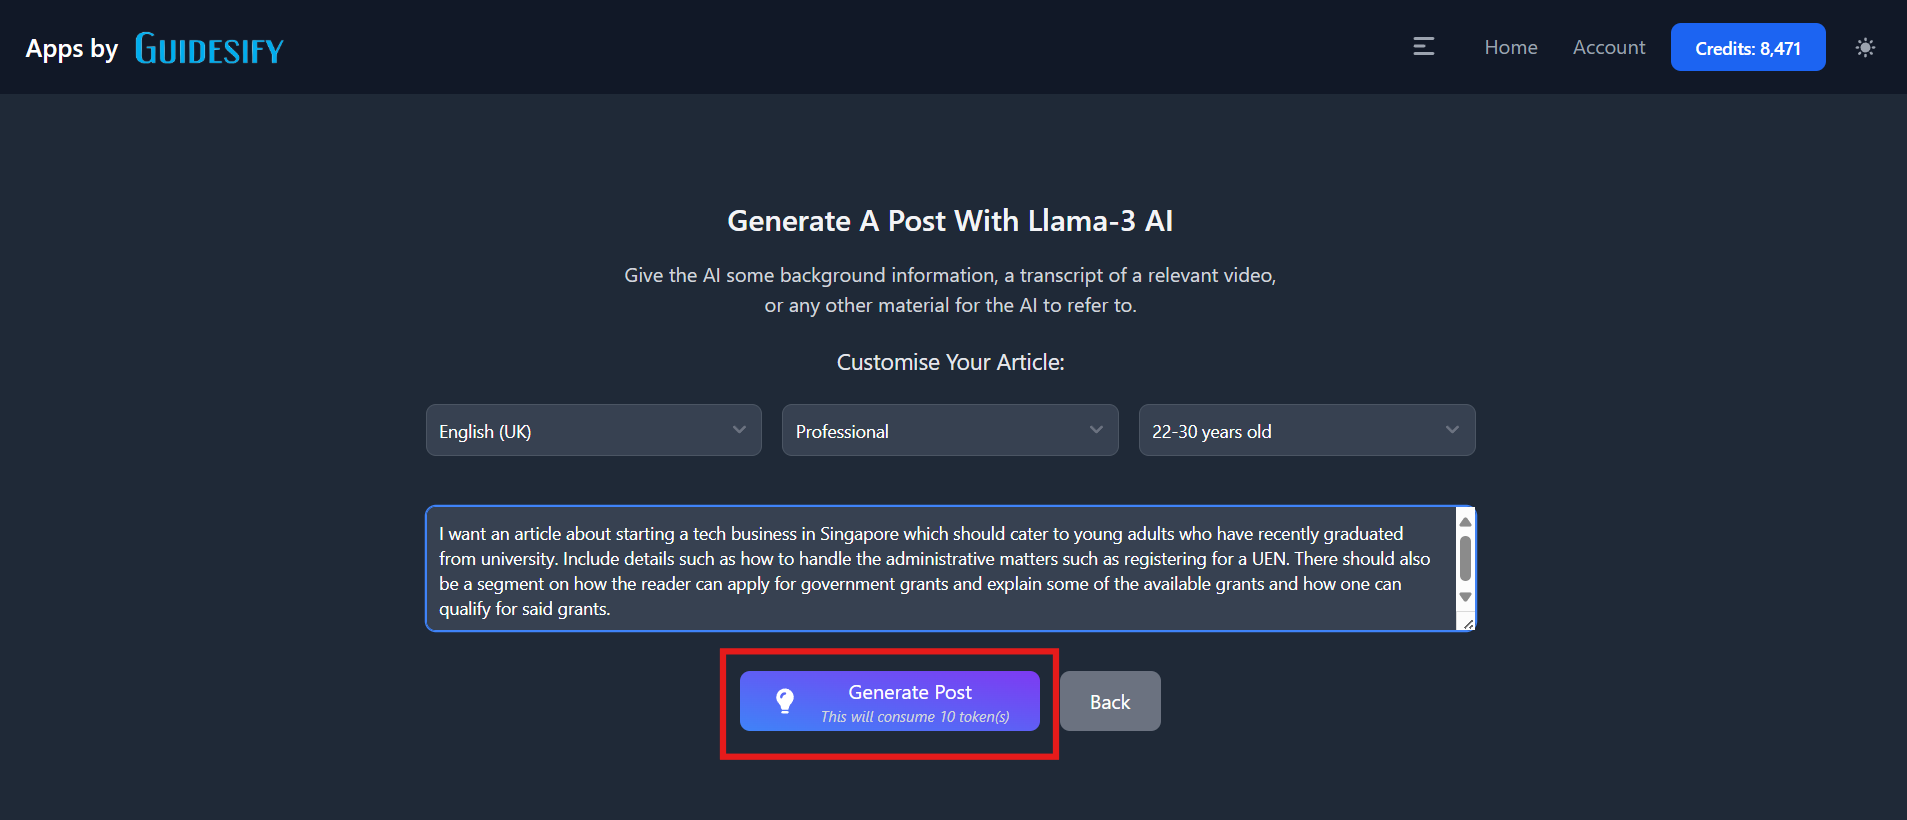
To generate an article, you will need to select the language, tone, and target audience of your article, as well as provide some context. This can be a simple paragraph or pasting a whole excerpt you want the AI to write an article based on. Take note that the action of generating an article will deduct 10 credits from your account's balance.
Once the article has been generated, you should have read through the article and if you are not satisfied with the current article, you may click on "Regenerate Post" to re-input your context and generate a different article based on your new set of context.
Take note that this will cost another 5 credits and that once you click on "Regenerate Post", your currently generated article will be lost and this is irreversible, so ensure that you truly wish to regenerate the article before clicking on the button.
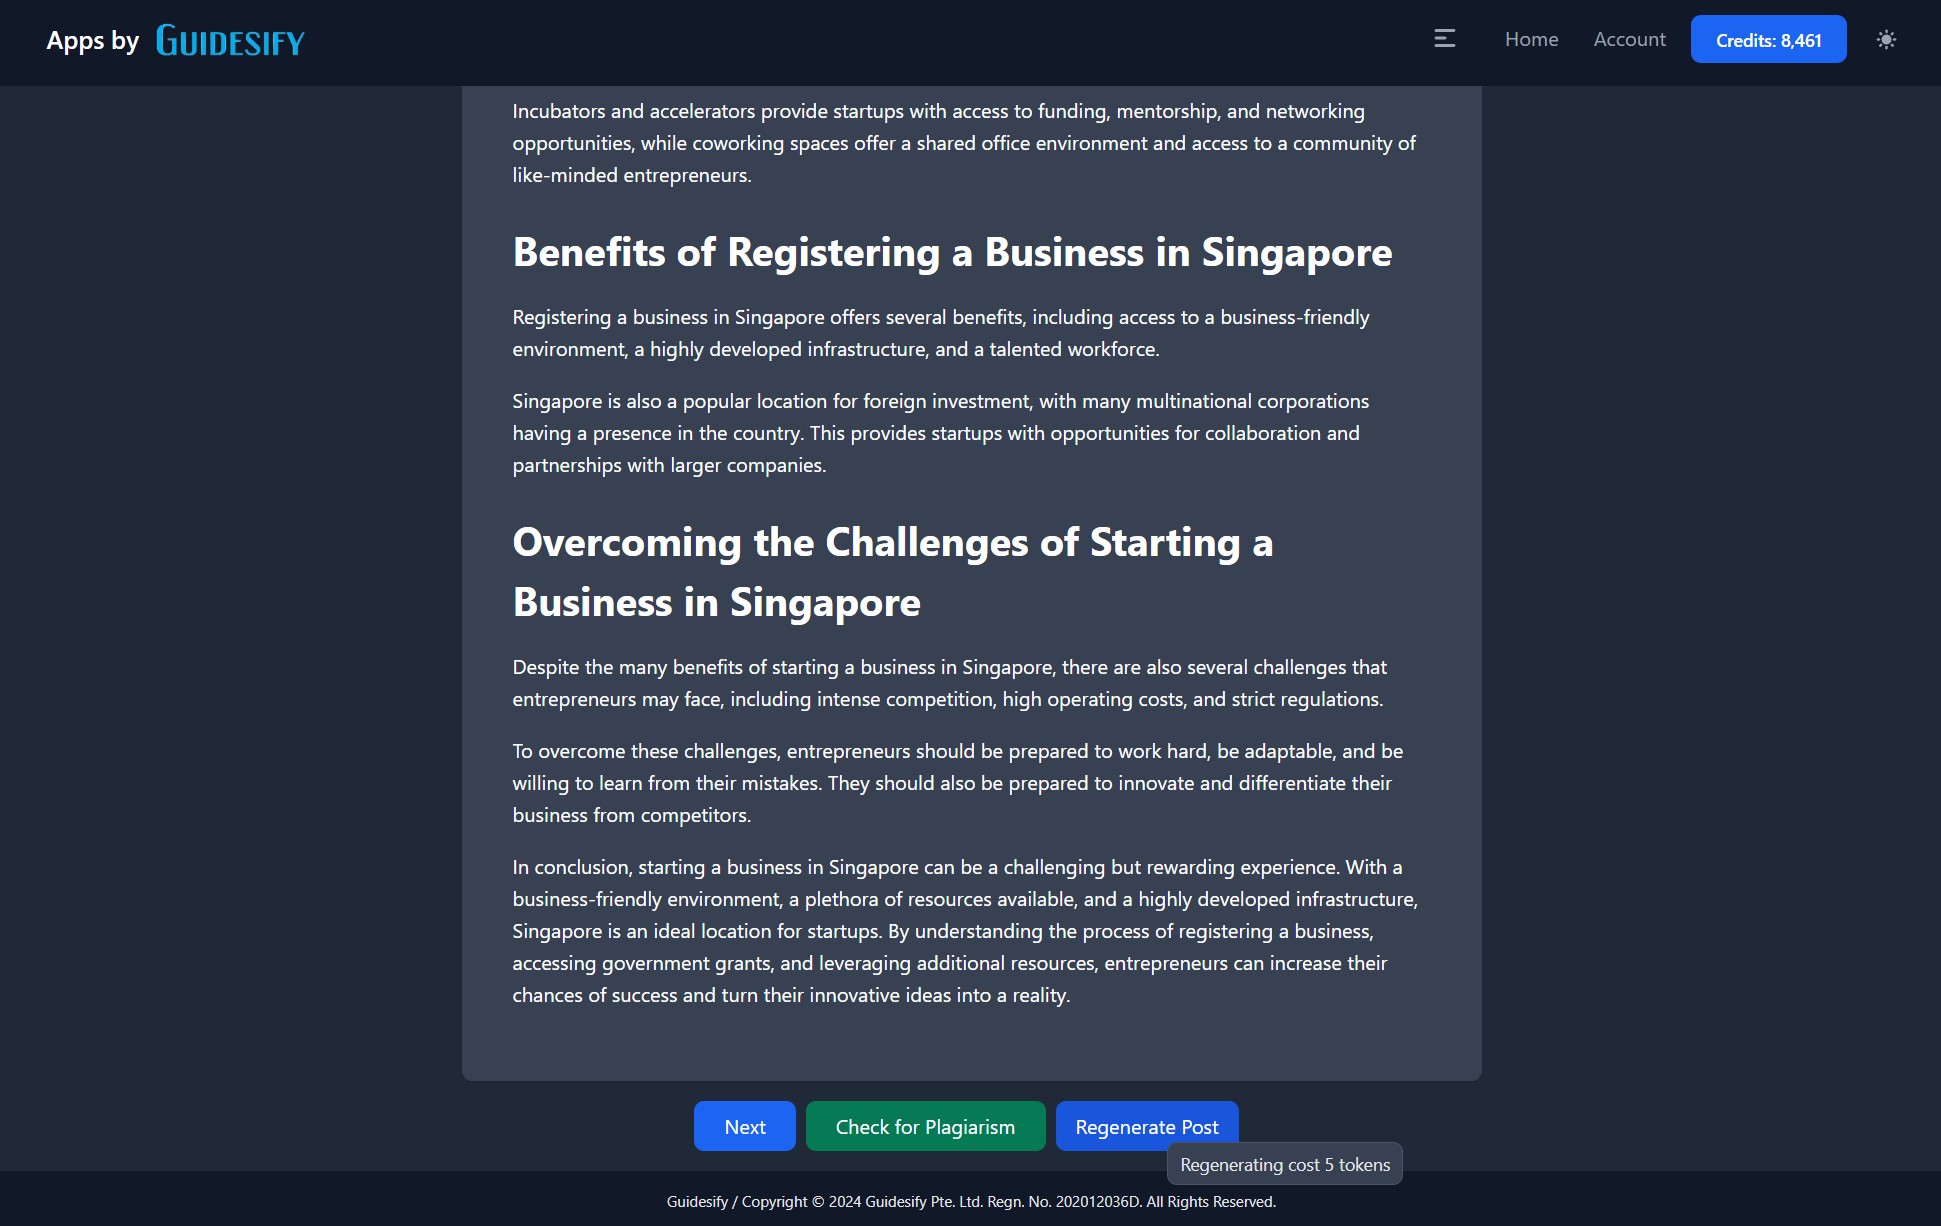
Once you are ready, if you would like to, you can use our plagiarism checker by clicking on "Check for Plagiarism", which works by comparing the similarity of your article to similar articles around the internet.
Afterwards, click on "Next" to proceed to do your necessary edits and formatting in the same manner as manually writing an article, where you can follow the instructions here.
Sniper Mode
If you have an excerpt in mind, that is you can access via a URL on your web browser, you should use the sniper mode. To use this, select the toggle the mode to "Sniper" and paste in the URL containing the excerpt you would like the AI to write an article based on.
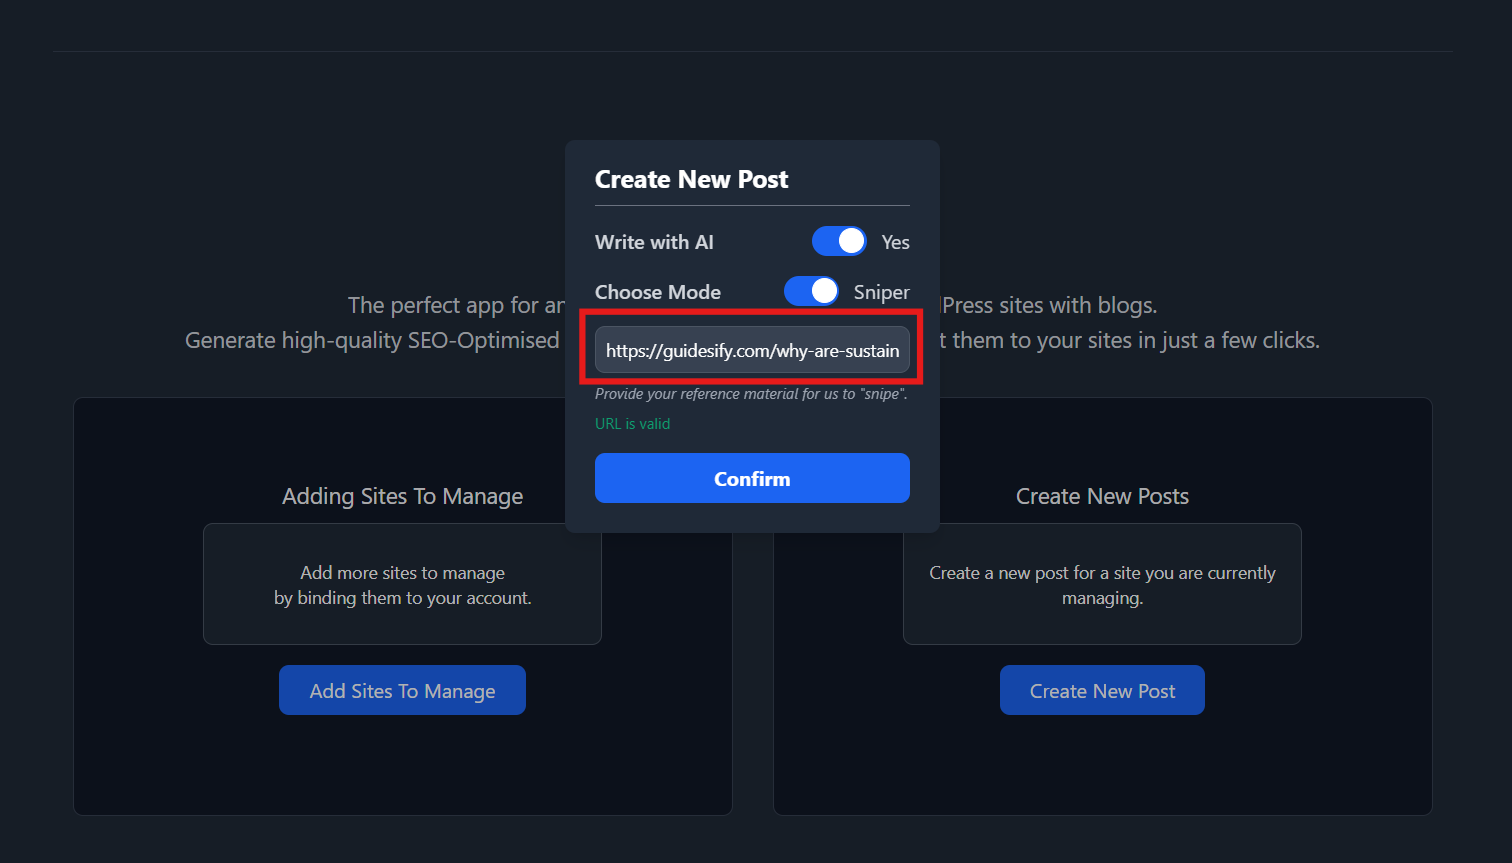
After that, follow the same steps to enter the title of the article and select the sites as per normal mode and click on "Write With AI".
The difference is that in sniper mode, the contents from the URL you have provided will automatically be placed in the excerpt without you needing to type anything. However, if you wish to add more context or make some changes to it, you can do so before you generate the post.
When you are done with setting up the context, proceed in the same manner as writing in normal mode, which you can see here.